Oncord Blog. Posted March 4th, 2022
Major DNS Update & New Features
We're committed to providing you with the tools and services you need to build your online presence. It's important to us that we never stop iterating and improving our platform based on your feedback. To make sure our customers are aware of how the platform is changing and improving, we run a routine updates blog.
Major DNS Update: Constellix
We've made some exciting changes to Oncord DNS to help further improve your website page speed. All Oncord powered websites now include
anycast DNS hosting when using our name servers, which improves the time that it takes visitors to connect to your website globally. Check
out the video above to learn more.
New Video Courses & Updated Articles
We've further extended the Help Articles section of our website with some new content:
New Video: Managing Sales:
https://www.oncord.com/resources/learning/tutorials/commerce/managing-sales/
New Video: How to Setup & Manage Affiliates:
https://www.oncord.com/resources/learning/tutorials/apps/affiliates/
New Article: Manage Adjustments, Credit Notes & Refunds:
https://www.oncord.com/resources/learning/tutorials/commerce/adjustments-credit-notes-refunds/
Updated Article: Accepting Credit Card Payments:
https://www.oncord.com/resources/learning/tutorials/commerce/accepting-credit-card-payments/
New Credit Card Payment Method:
Pinch Payments
Pinch is now available as a method for Australian-based Oncord users to accept credit card payments.
Why do we love Pinch Payments?
- No setup, minimum or monthly fees.
- Support for both once-off and recurring credit card payments.
- Invoice payments are recorded and automatically reconciled in your accounting software (Xero, myob and QuickBooks).
Special offer until 31/03/2022:
Pinch are currently running a limited-time offer for new customers. To find out more, head over to the Pinch website now to get started: https://www.getpinch.com.au/
You can configure payment methods within Oncord via:
Dashboard > Settings > Commerce > Payment Methods.
New Fancy Box Variant: Accent

The Fancy Box is an element available when editing Oncord web pages. It's similar to a card element, with a few extra added
features (hence the "fancy").
The Fancy Box element provides a number of variants, which allows you to change the appearance to better suit your website. With this update, we've added an additional variant called "Accent".
To see the new element in action, navigate to Dashboard > Website > Pages, and edit a website page.
Click the "Insert" option in the left-panel, and then drag-and-drop a "Fancy Box" element onto the page. You'll likely want to place the Fancy Box within a Section element, to provide better control of spacing and alignment with other elements on the page.
After placing a Fancy Box element on the page, select it, click "Edit", and change the variant to "Accent". There are plenty of other element options included in the left-panel to customize the appearance.
Edit Products, Categories, Brands & Events
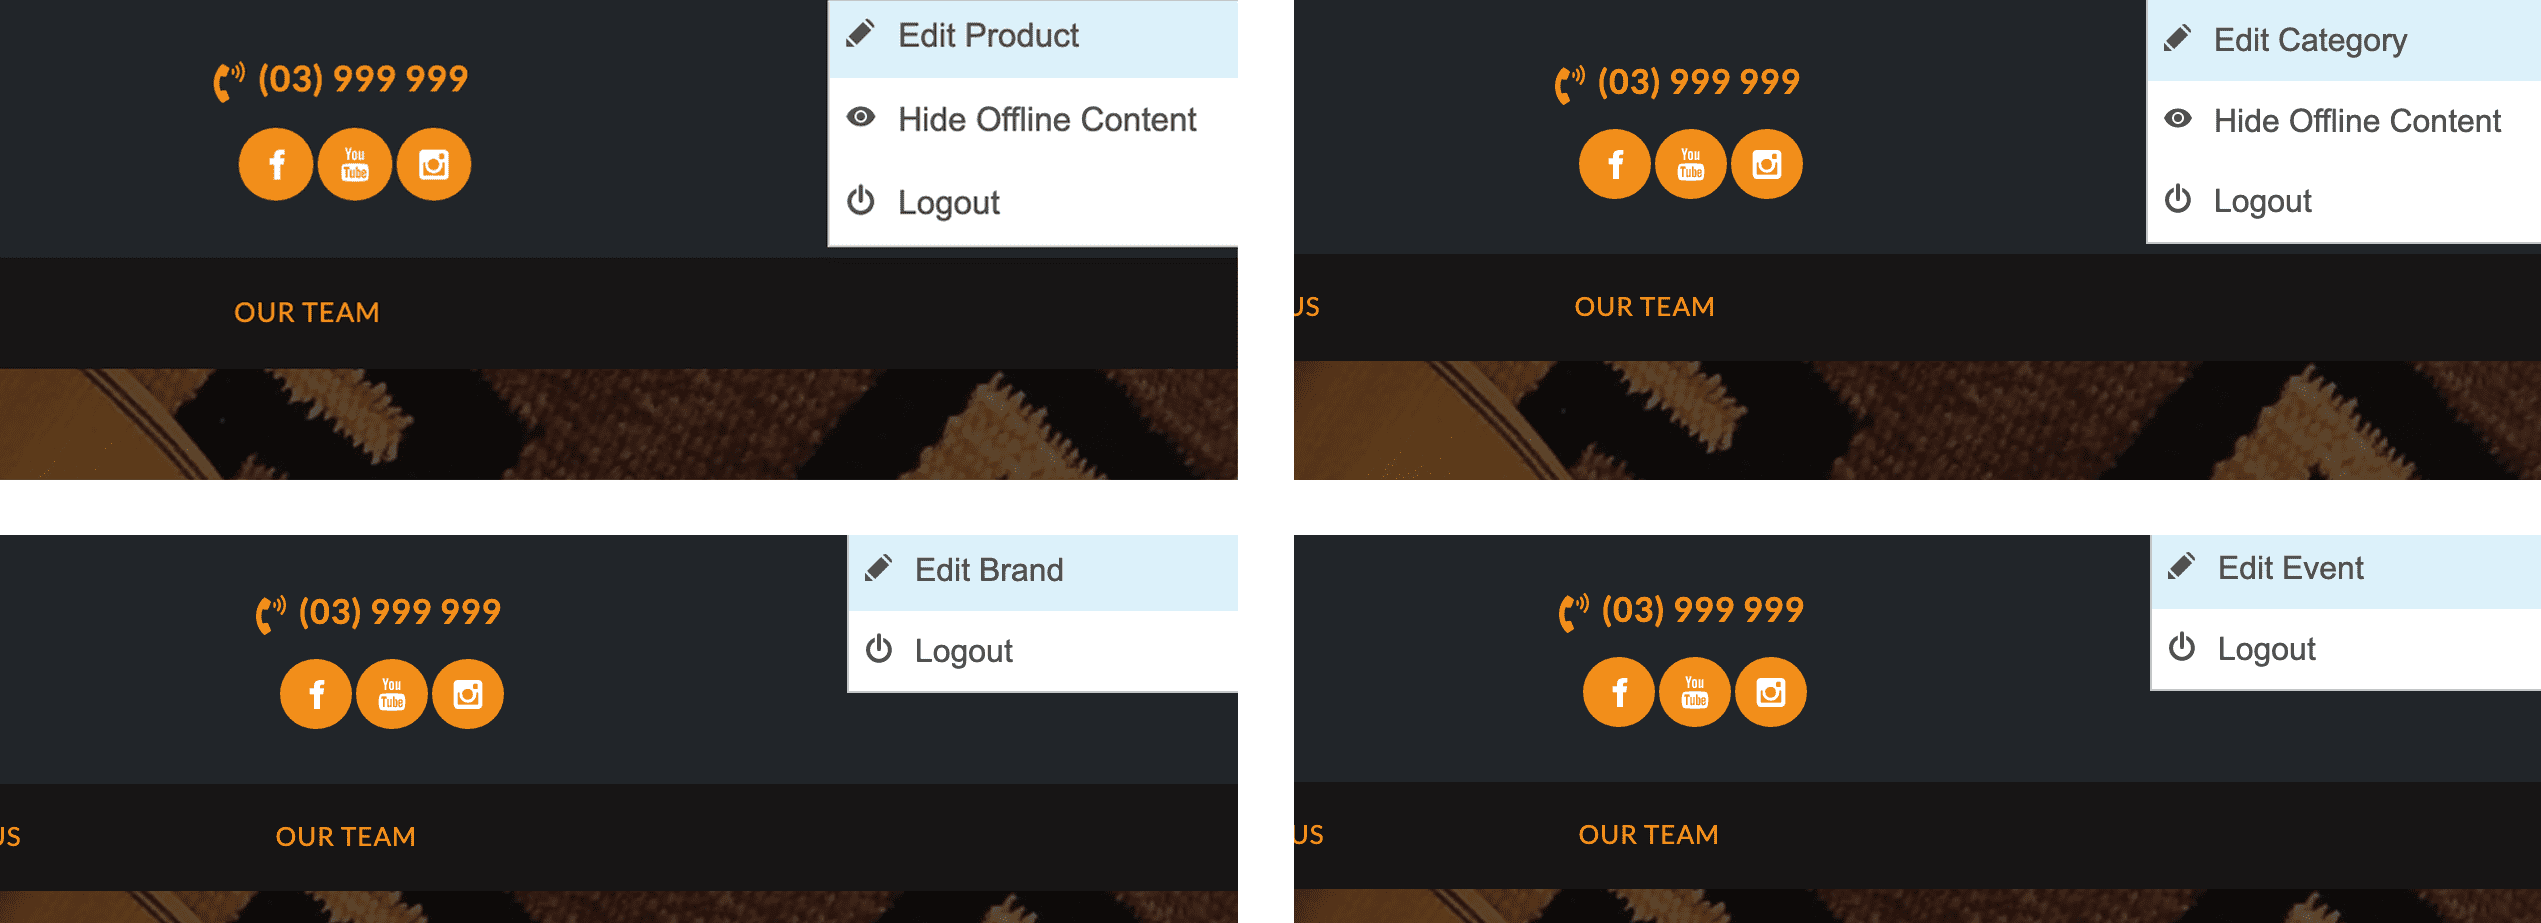
While browsing your website as a logged-in administrator, Oncord shows a button in the top right of the screen, allowing you to quickly
edit the page you're visiting.
Oncord will now show the same tool when viewing Products, Product Categories, Product Brands, and Events, allowing you to quickly edit the content you're currently viewing.
Preview of Google Appearance for Products & Product Categories
Metadata is used to show a preview of your website content in search engines, and on social media.
Oncord makes it easy to update the metadata of your website pages. Simply edit a website page, and click the Settings button shown in the left panel (click here for more info).
When you configure the settings of your web pages, Oncord shows a preview of how the page title, description and other metadata will look when the page is listed in search engines such as Google.
The same preview is now available when editing Products and Product Categories. To see the preview in action, edit the Product or Product Category, and select the "SEO" tab.
Filter Contacts with a Password Set
Oncord contacts are usually not required to set a password at the time they're created (either manually, or via a web form). This is to
help reduce friction when your website visitors sign-up for a newsletter or makes a purchase.
However, they may need a password later in order to access a restricted area or other functionality on your website.
To tackle that requirement, Oncord includes an "Update Profile" tool, which helps you send an email campaign to contacts, asking them to update their details or set a password.
With the latest update, we've added a new condition to filter contacts, allowing you to target contacts who do not have a password set.
To see this tool in action, navigate to Dashboard > Customers > Contacts, and then click the "Filter by Conditions" link at the top of the screen. This tool is also available when sending an email or sms marketing campaign.
Terminate Recurring Sales via Automation
We've added a new workflow step to Automations, specifically for those using the Recurring Billing app.
It's now possible to terminate a recurring sale via Automation. The main use cases:
- Terminate a recurring sale after a contact completes a "cancellation" form on the website.
- Terminate a recurring sale when a contact is added (or removed from) a group.
Manage Custom Contact Relationship Types

We've added a new Dashboard page to help you clean-up any custom relationship types that you have configured, and bulk update all contacts who are using custom relationship types.
Oncord contact records can be linked by a relationship. As an example, you might have an "Alex" individual contact, configured with an "employee" relationship to an "Oncord" company record. When you view the profile of either contact record, you'll see contacts linked by a relationship.
You can also specify your own custom relationship types. So rather than using the default relationship "employee", you could create a custom relationship called "Chief Financial Officer".
You can view this new page by navigating to:
Dashboard > Customers > Contacts > Custom Relationship Types.
Developers
Apps & Integration Improvements:
We've improved how Oncord handles integrations that are either disconnected, or experiencing an issue due to a third-party API being
offline.
Copy & Paste Mobile Improvements:
We've made some improvements to copy / paste in the visual editor for mobile devices.
Ajax Loader Updated:
The loading animation has been improved and updated with a new appearance (blue bar along the top of the screen).
Changes System Improvements:
We've made some improvements to the changes system, specifically targeting cases where you need to undo a very large number of changes at
once.


Leave a Comment