-
Website
-
3min Explainer Walkthrough

- Generate a Design
-
Page Management

-
Page Editing

-
Form Builder

- Updating Your Navigation Menu
- Creating Page Redirectors
- Posts Management
-
Search Engine Optimization

- Setting Up Google Marketing Tools
- Setting Up Meta Pixel & E-commerce Tracking
- Setting Up Microsoft Marketing Tools
- Setting Up Linkedin Insight Tag
- Optimizing Images For Web
-
Analytics

- Third Party Embed Code
-
3min Explainer Walkthrough
- Contacts
- Marketing
- Commerce
- Apps
-
Settings and Config
- Going Live
- Billing
- Domain Health Checker
- Managing Administrators
- Registering a Domain Name
- Changing Your Domain Name
- The Role of DNS Records Explained
- Backing Up Your Website
- Choosing an E-mail Host
- Hosting Email With Oncord
- Setting Up Gmail Hosting
- Setting Up Microsoft 365 E-mail Hosting
- Setting Up Sub Domains
- Hosting a Sub-Site
Export Sales
Whether you need to share sales data with your accountant or analyse transaction history offline, Oncord’s Export Sales tool allows you to generate customised exports of your sales records, by invoice or by individual items sold.
This tutorial covers how to access the Export Sales tool, outlines the two available export types, and explains the filtering options available to tailor your data export.
How to Access the Export Sales Tool
- Navigate to your Dashboard > Commerce > Sales
- Click the three-dot menu in the top-right corner
- Select “Export” from the dropdown
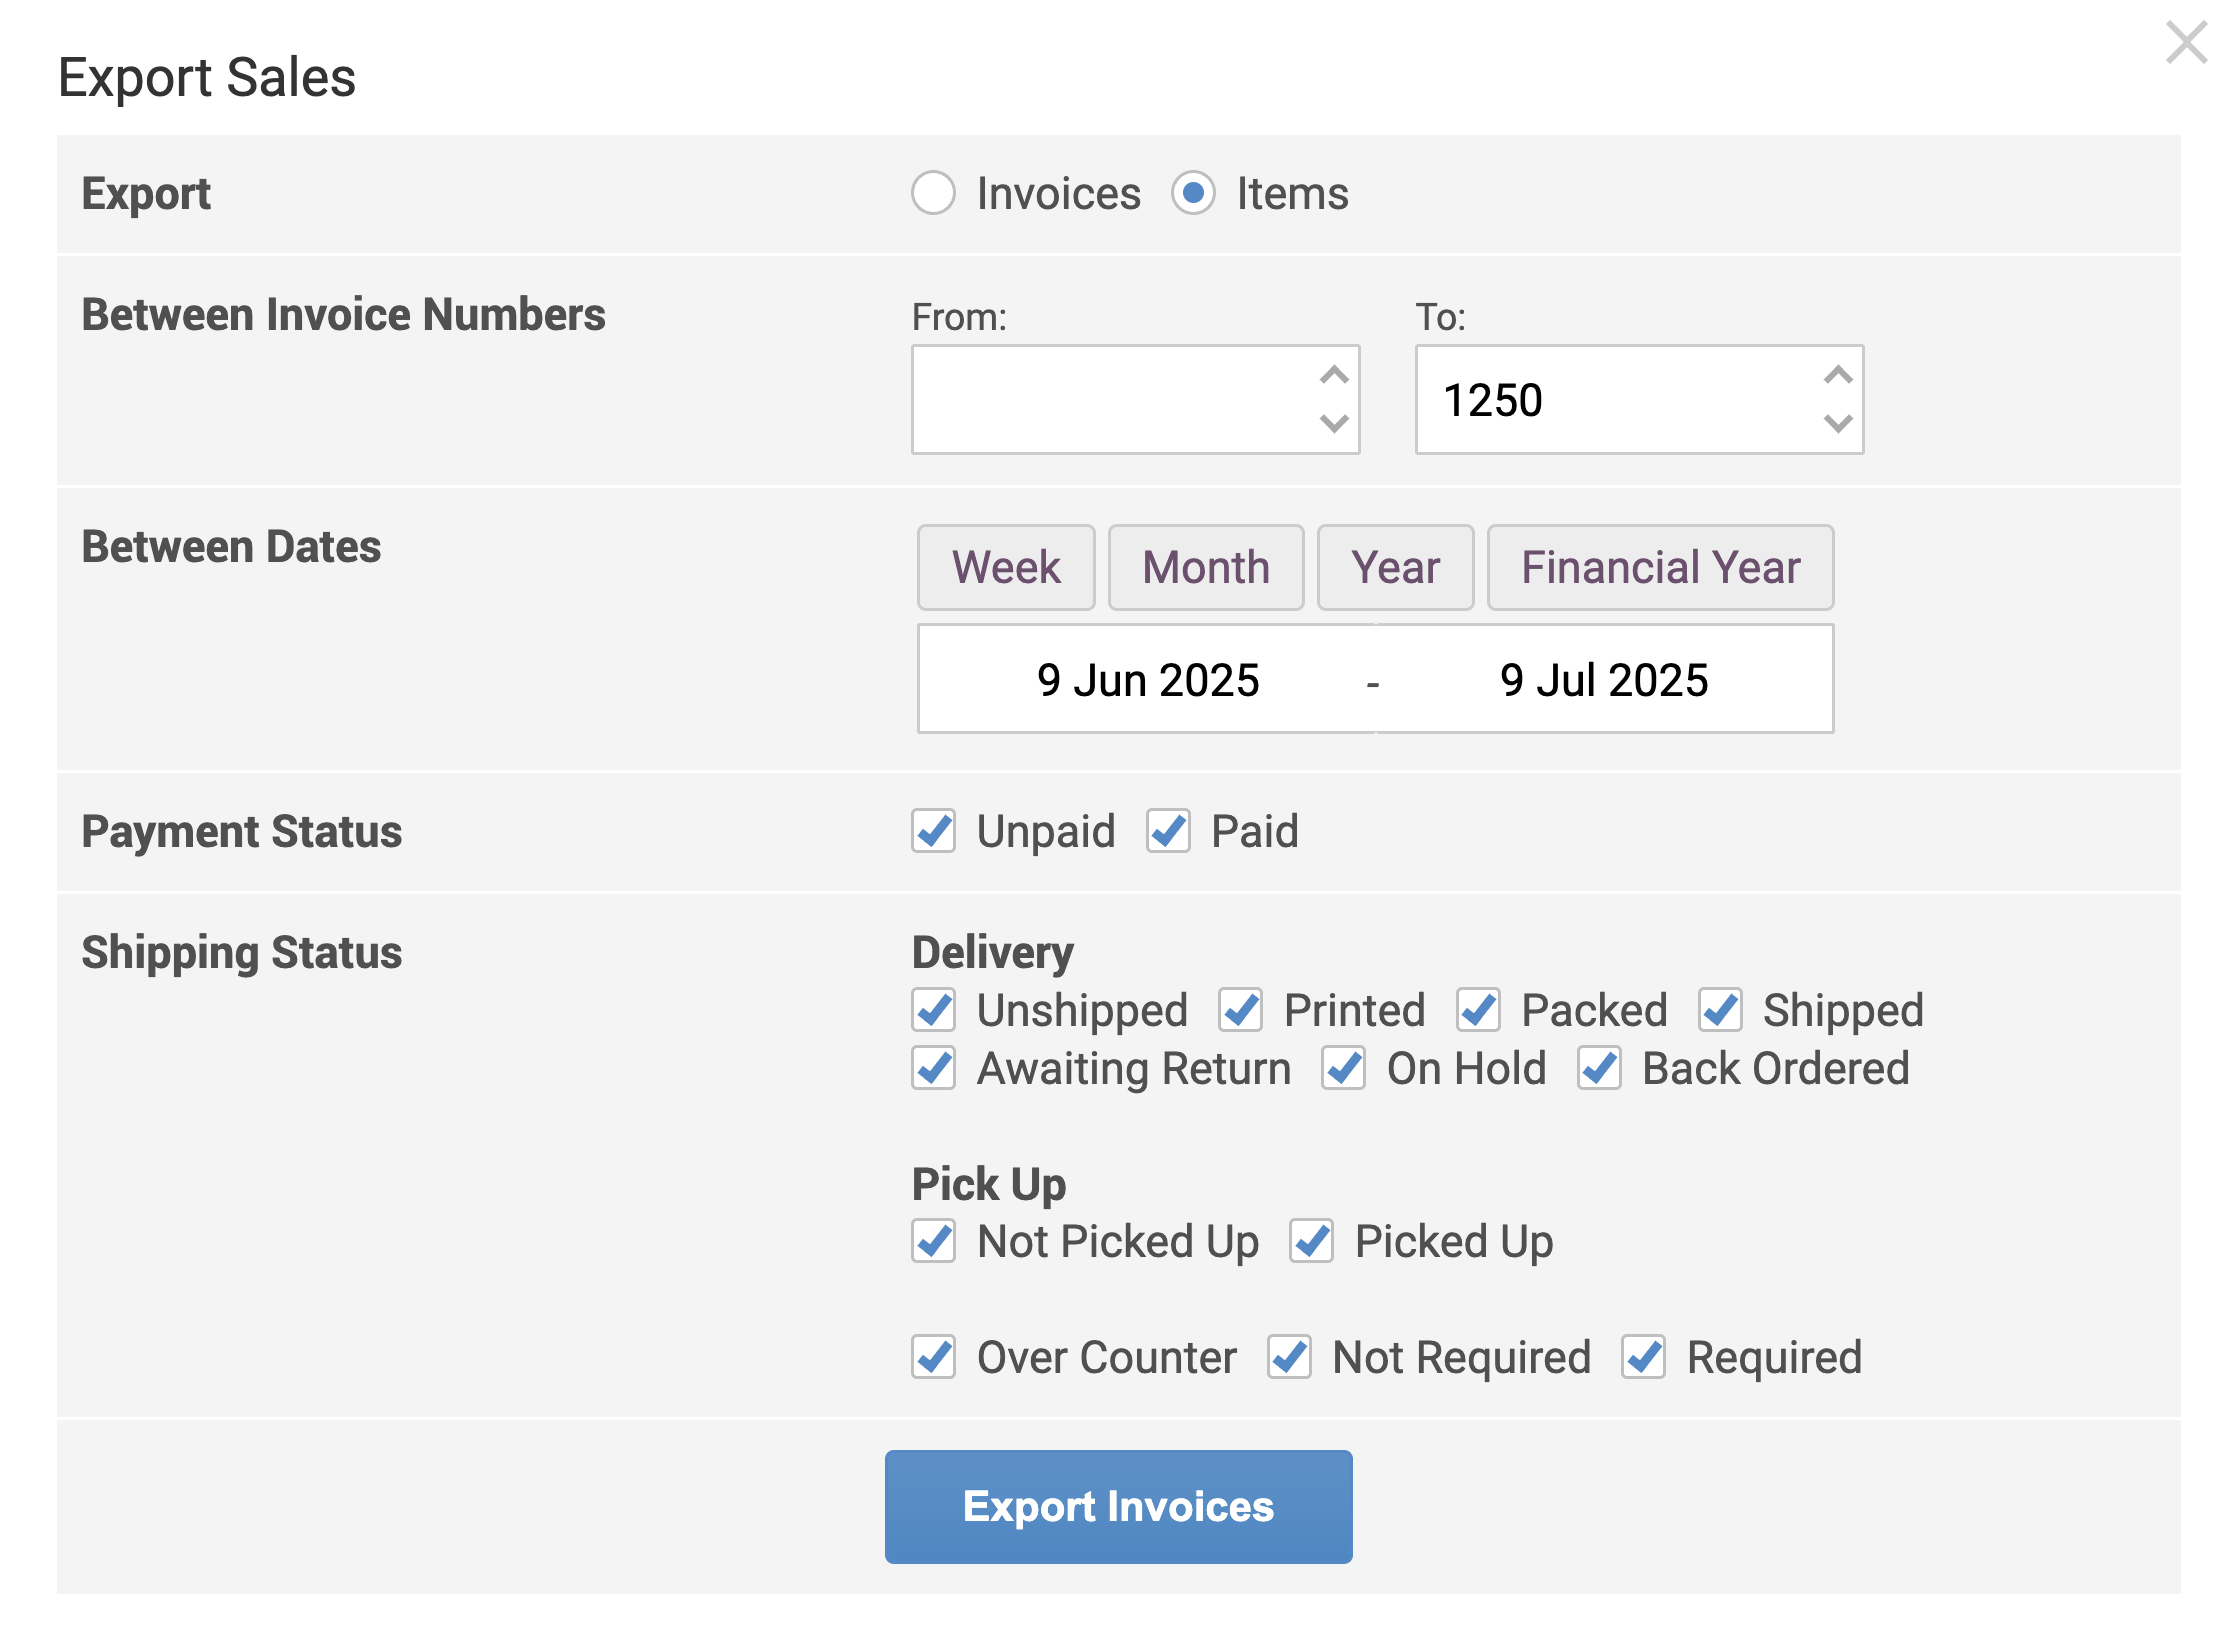
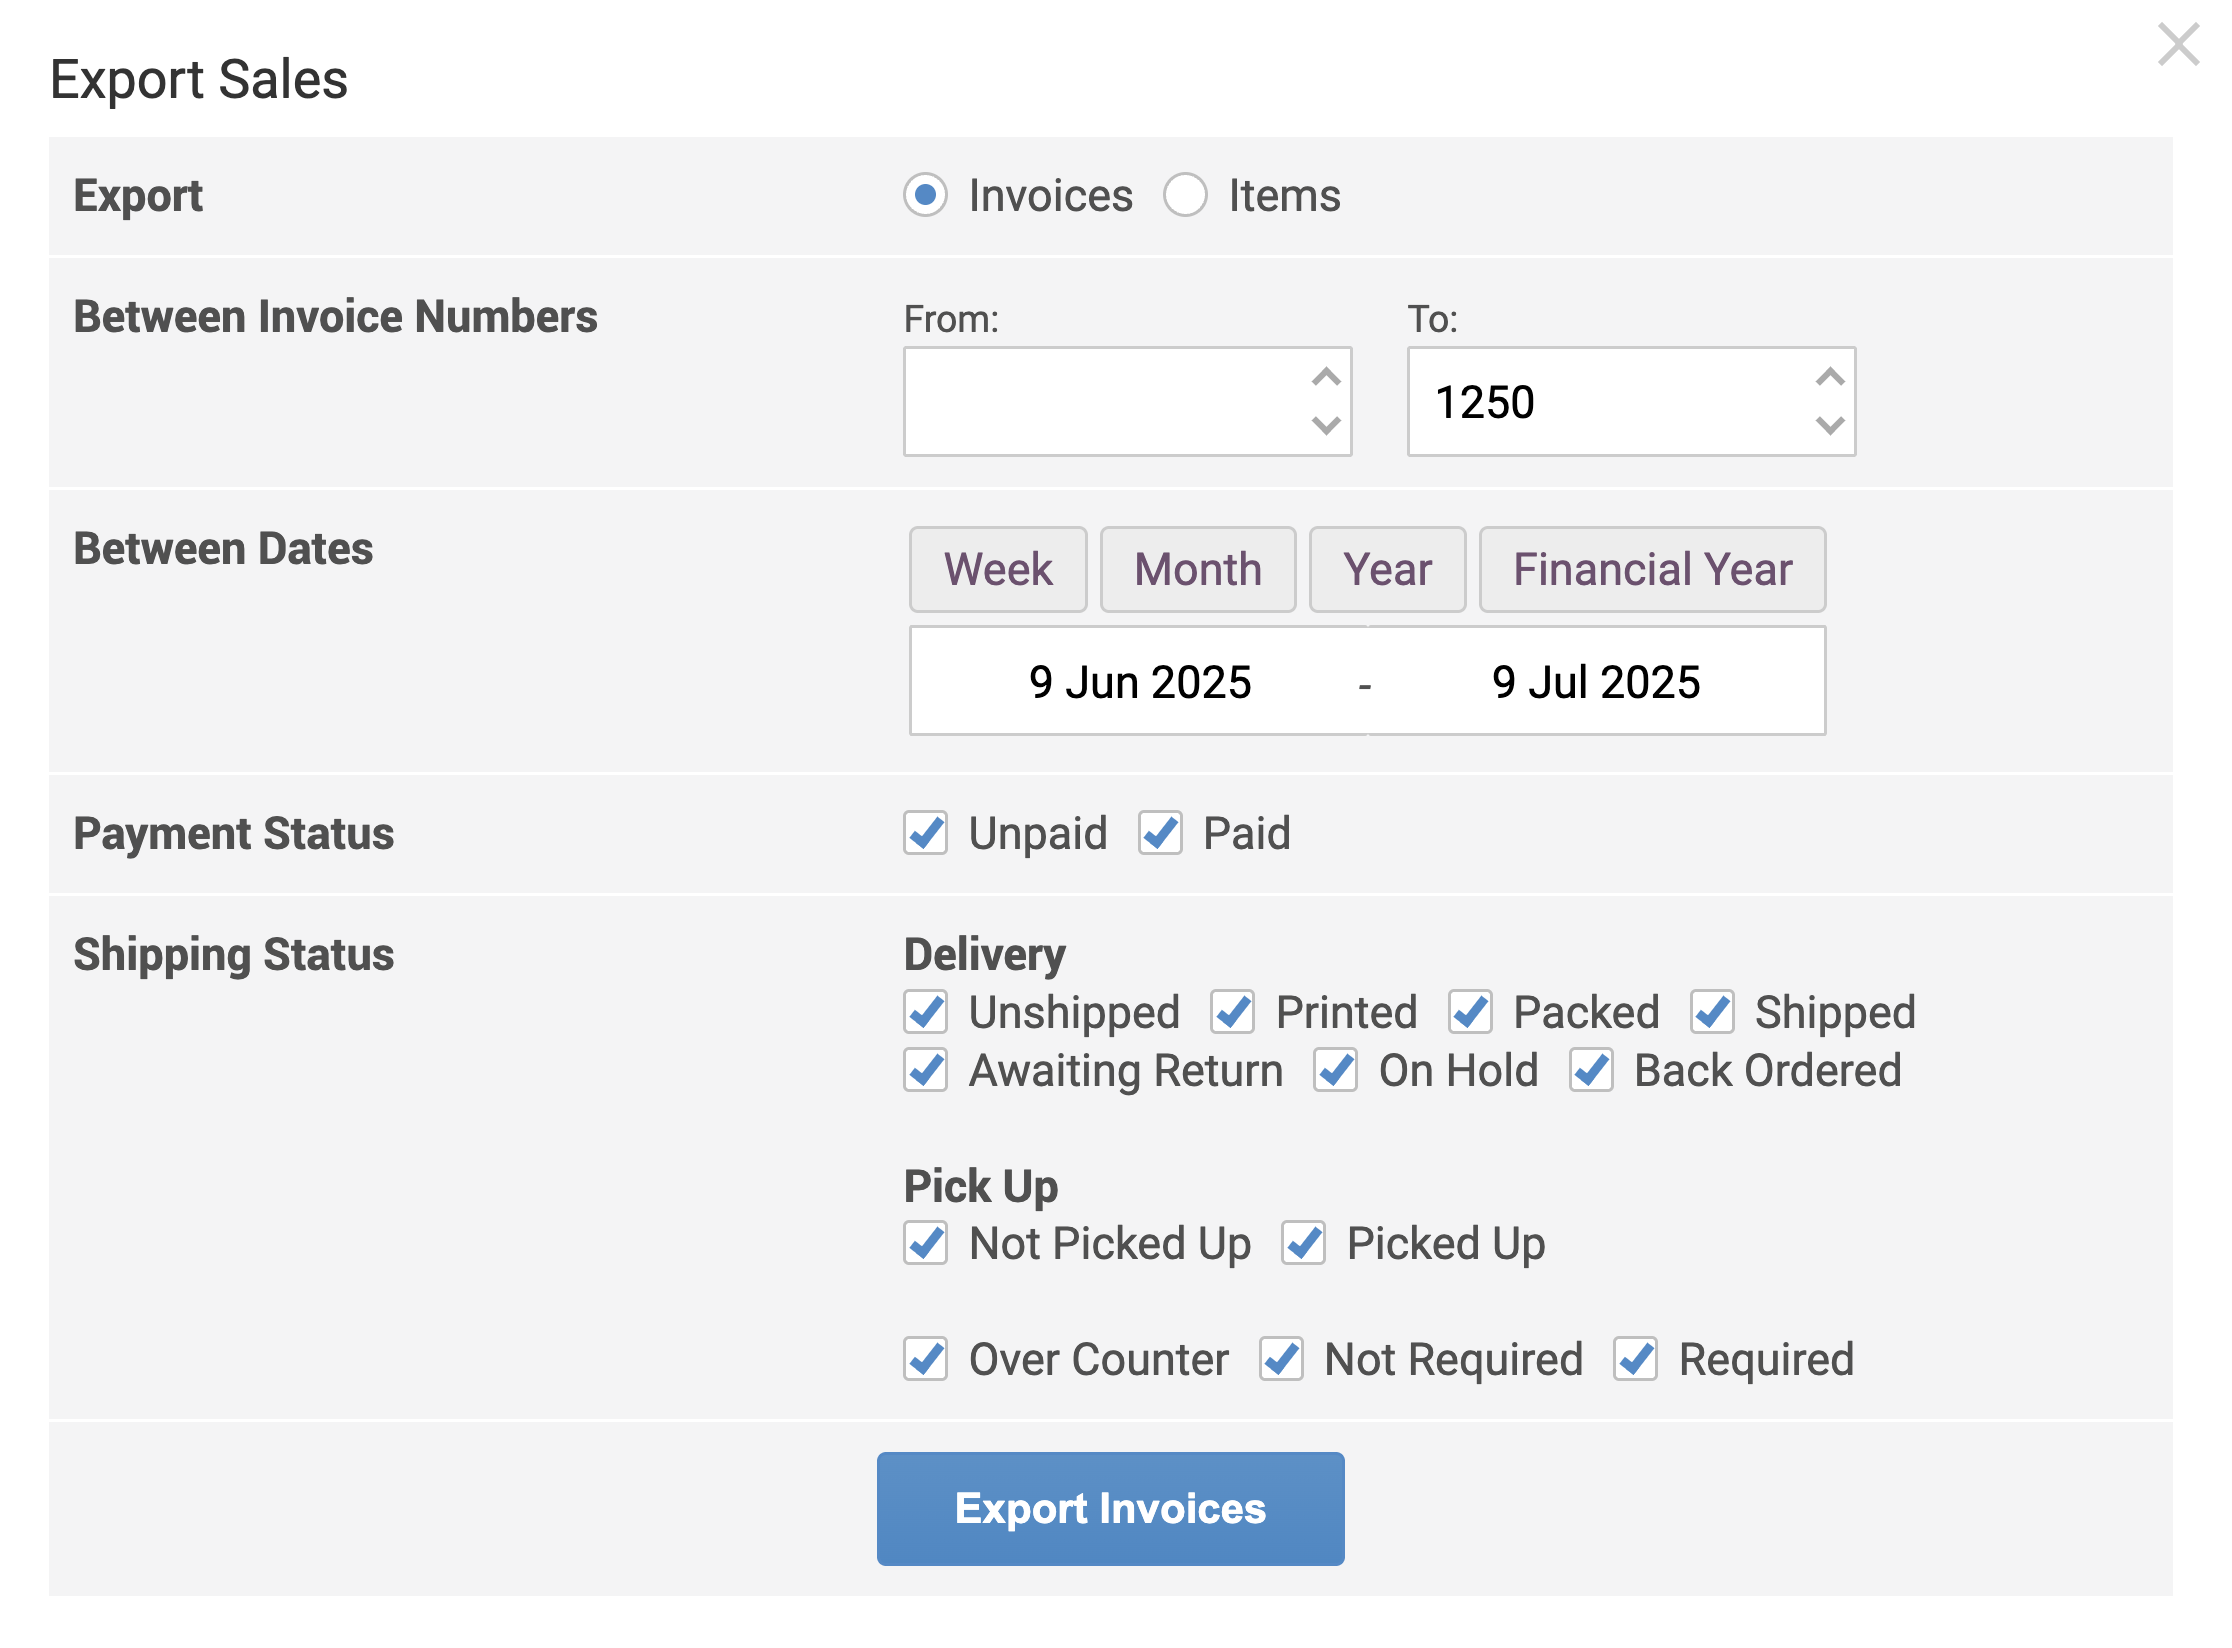
You’ll be presented with the Export Sales window, where you can choose to export either Invoices or Items based on your reporting needs.
1. Export Invoices
Choose the Invoices option to export a list of entire sales transactions. This includes summary information per invoice such as the total amount, payment status, and shipping details.
Filtering options include:
- Invoice Number Range – Export invoices between specific numbers
- Date Range – Filter by week, month, year, or custom dates
- Payment Status – Include paid, unpaid, or both
-
Shipping Status – Filter by delivery and pickup status, including:
- Unshipped, Packed, Shipped
- Not Picked Up, Over Counter, Required, etc.
- Unshipped, Packed, Shipped
After applying your filters, click Export Invoices to download the data in a structured file format (e.g. CSV), suitable
for use in accounting software or spreadsheet tools.
2. Export Items Sold
Select the Items option to export data at the product level. This includes each individual product sold across all invoices along with quantity, price, and related details.
This is particularly useful for:
- Inventory reconciliation.
- Product performance analysis.
- Sales audits at the item level.
Just like with invoice exports, you can apply filters based on invoice numbers, dates, payment status, and shipping status.
Once configured, click Export Items Sold to generate your item-level export.