
-
Website
-
3min Explainer Walkthrough

- Generate a Design
-
Page Management

-
Page Editing

-
Form Builder

- Updating Your Navigation Menu
- Creating Page Redirectors
- Posts Management
-
Search Engine Optimisation (SEO)

- Setting Up Google Marketing Tools
- Setting Up the Meta Pixel and E-commerce Tracking
- Setting Up Microsoft Marketing Tools
- Setting Up Reddit Pixel and E-commerce Tracking
- Setting Up Linkedin Insight Tag
- Optimizing Images For Web
-
Analytics

- Third Party Embed Code
- Special Files
- Setting Up OpenAI Ads Manager
-
3min Explainer Walkthrough
- Contacts
- Marketing
- Commerce
- Apps
- Settings and Config


Running Sales
You can create a sale from the dashboard for an order that doesn't come through your website, such as a phone order or a payment taken in person. This article explains how to run a manual sale, from choosing the contact to confirming the order.
Before You Begin
- Set up your payment methods and shipping methods under Dashboard > Settings > Commerce. See Payment Methods and Setting Up Shipping Methods.
- A payment or shipping method only appears on a manual sale when its Available to administrators when manually processing new sales. option is ticked.
Start a New Sale
- Go to Dashboard > Commerce > Sales.
- Click New Sale.
Select an Existing Contact, or Create a New Contact
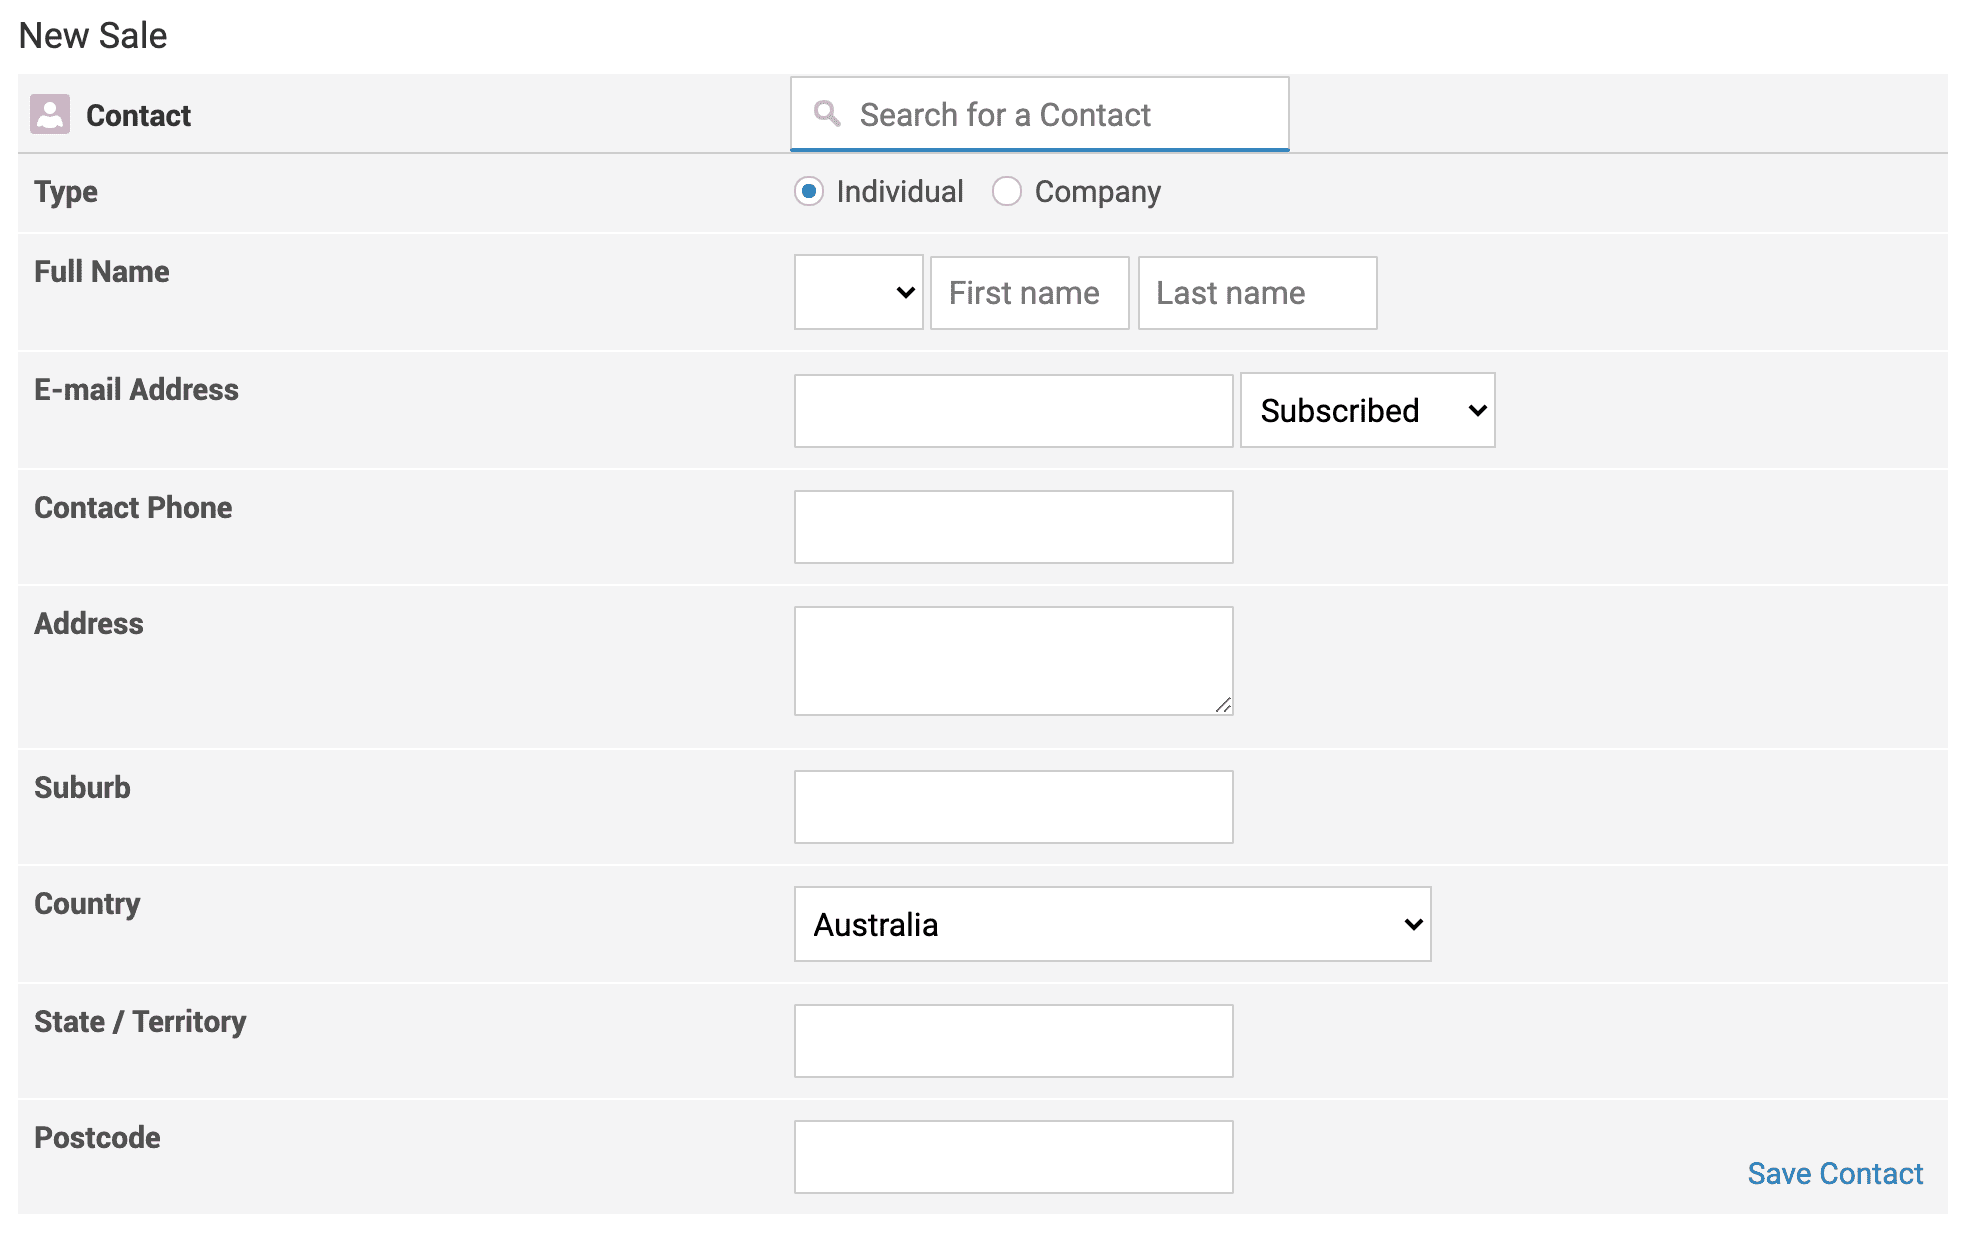
Every sale must be assigned to a contact. The sale can't be confirmed until one is selected or saved.
- To use an existing contact, search for them in the Search for a Contact box at the top of the form.
- To create a new contact, enter their details, such as Full Name, E-mail Address and Contact Phone.
- Click Save Contact to save the new contact.
Select a Product
You can add a product from your catalogue, or enter a custom item to describe a charge.
- In the Product column, search for a product by name.
- Select the product from the results. It's added to the sale.
- To add a custom item instead, type its description in the same field.
- Enter the tax rate and the Per Unit price for the custom item.
- Click Add Item.
- Change the Qty if needed.
- To apply a discount code, enter it in the Discount Code field below the items, then click Apply. This field only appears when you have discount codes set up.
Select Delivery & Payment Methods
- If the order needs shipping, select a delivery method under Delivery Methods. This section only appears when an item in the sale requires shipping.
- If automatic discounts apply, review them under Discounts Off Cart Total. Click Disable beside a discount to leave it off this sale.
- Check the totals under Summary.
- Add any notes about the sale in Comments.
- To email the invoice to the customer, tick Send E-mail to Customer. A manual sale doesn't email the customer unless this is ticked.
- Under Select Payment Method, select how the customer is paying. Select Receive Payment Later if the customer will pay after the invoice is created.
- Enter any payment details the selected method asks for.
Confirm the Sale
- Click the Confirm Order button to create the sale. Its label can include the payment type, for example Confirm Order & Receipt of Cash Payment.