
-
Website
-
3min Explainer Walkthrough

- Generate a Design
-
Page Management

-
Page Editing

-
Form Builder

- Updating Your Navigation Menu
- Creating Page Redirectors
- Posts Management
-
Search Engine Optimization

- Setting Up Google Marketing Tools
- Setting Up Meta Pixel & E-commerce Tracking
- Setting Up Microsoft Marketing Tools
- Setting Up Linkedin Insight Tag
- Optimizing Images For Web
-
Analytics

- Third Party Embed Code
-
3min Explainer Walkthrough
- Contacts
- Marketing
- Commerce
- Apps
-
Settings and Config
- Going Live
- Billing
- Domain Health Checker
- Managing Administrators
- Registering a Domain Name
- Changing Your Domain Name
- The Role Of DNS Records Explained
- Backing Up Your Website
- Choosing an E-mail Host
- Hosting Email With Oncord
- Setting Up Gmail Hosting
- Setting Up Office 365 Hosting
- Setting Up Sub Domains
- Hosting a Sub-Site
Managing Administrators
Administrators are contacts within Oncord who are able to login to the Dashboard.
It's important that each person who is accessing Oncord has their own unique administrator login. Don't share login details among multiple people.
There is no limit to the number of administrators, and inviting administrators does not increase your pricing plan.
Administrators will be required to enter a mobile number which may be used if their account is locked due to suspicious activity (eg. overseas login).
To manage administrators: Navigate to Dashboard > Settings > Administrators.
Inviting a New Administrator
- Navigate to Dashboard > Settings > Administrators.
- Click the "Invite Administrators" button at the top of the page.
- Enter the e-mail address of the new administrator.
- Select an Administrator Role. Administrator Roles define which features of the dashboard the administrator may access (more below).
- Click "Create Administrator" to invite the new administrator.
Didn't receive the e-mail? Check the junk / spam folder of your inbox.
Removing an Administrator
- Navigate to Dashboard > Settings > Administrators.
- Click the menu next to the administrator's name.
- Select the option "Remove Admin Privileges". The admin will no longer be able to login to the Oncord Dashboard.
-
The removed administrator will remain in the system as a Contact. It's usually ideal to keep this data and their logged activity. Navigate
to Dashboard > Customers > Contacts to unsubscribe or delete the contact instead.
Configuring Administrator Roles
By default, administrators will have full access to use all features enabled on your Oncord account.
Administrator roles can be used to restrict access to certain features of Oncord.
As an example scenario;
On your team you may have a "blog manager" and "product store manager". The product store manager doesn't need to make changes to the website, and the blog manager doesn't need to make changes to the Product Catalog.
In this situation, rather than both team members having full system access, you can create a "product store manager" role, and a "blog manager" role.
The "product store manager" role only allows access to the Commerce features of the Oncord Dashboard, and the "blog manager role" would only have access to the Website features.
Creating a New Security Role
- Login to the Dashboard and click the "Settings" icon, located at the bottom of the left sidebar.
- Select the "Administrators" heading.
- Click the button labeled "Configure Roles and Security" to view all the current security roles.
- Click the "New Role" button at the top of the page to begin creating a new role.
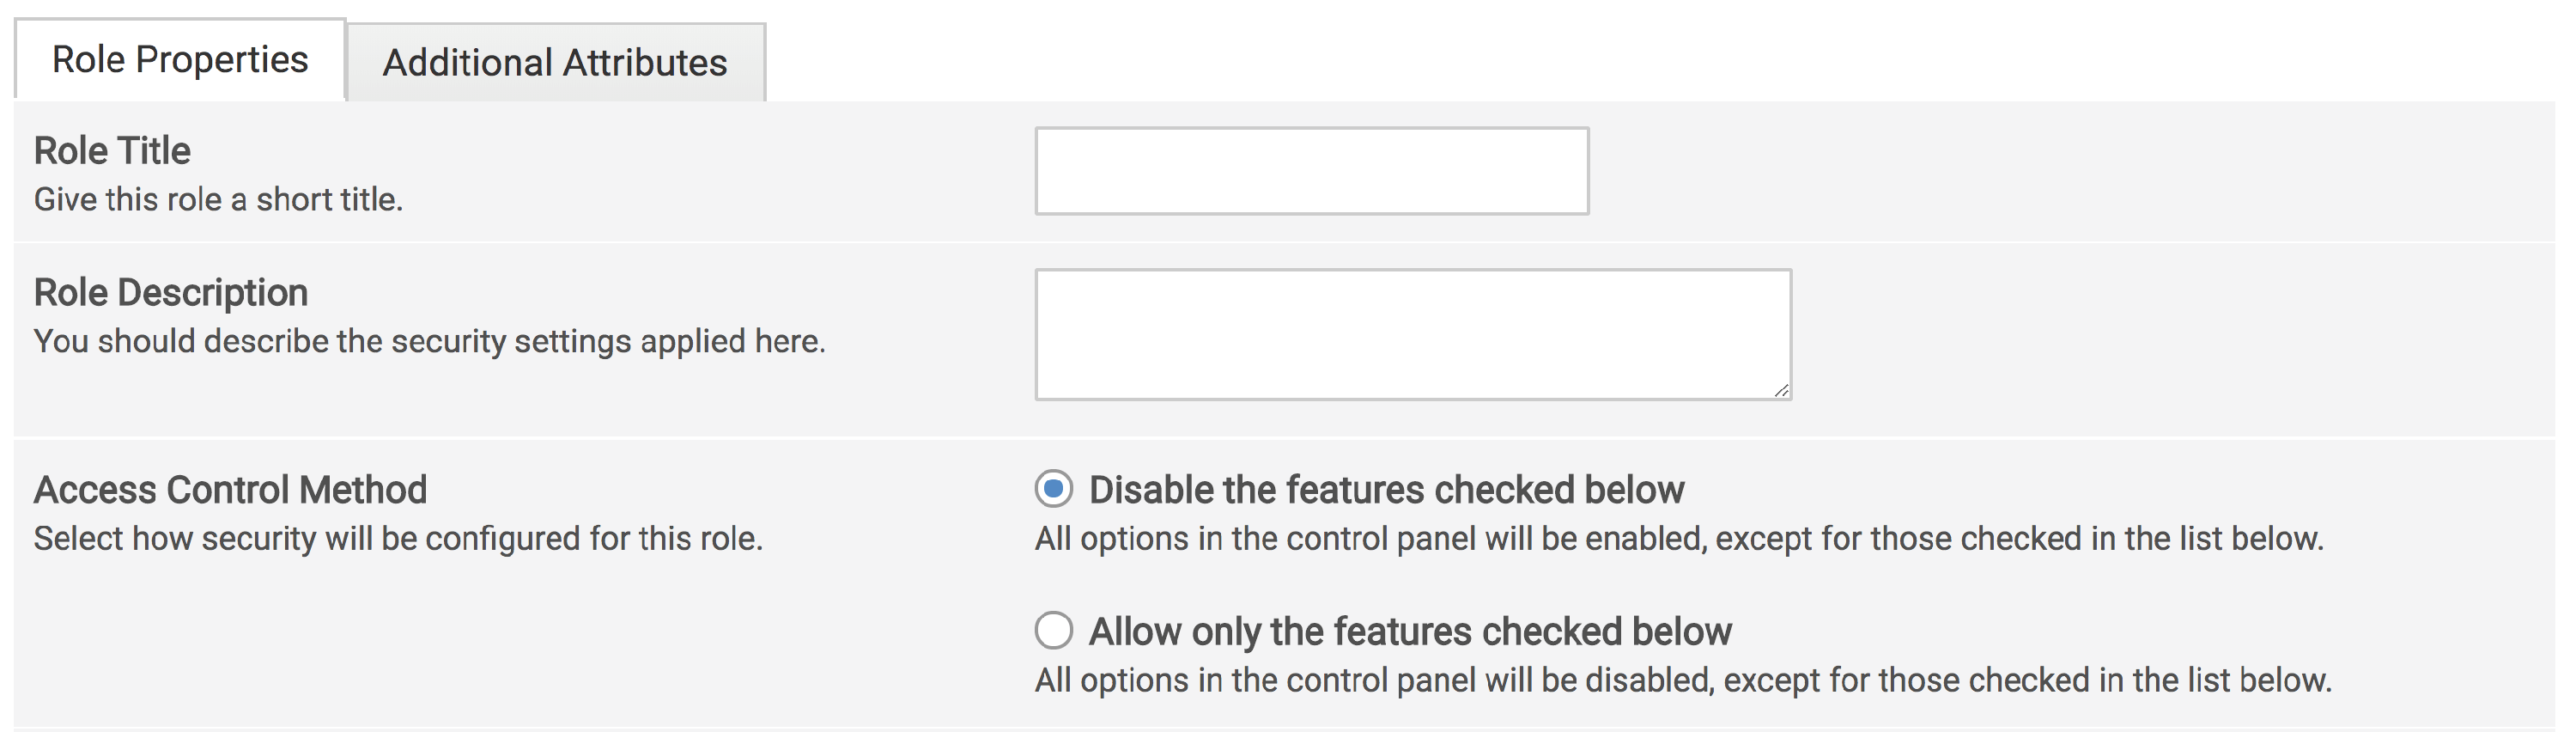
Enter a meaningful title for identifying the role and a description that accurately describes the use of the role. The 'Access control
method' option allows you to choose how you want the below access checklist to function, you have two options: 'Disable the features
checked below', or 'Allow only the features checked below'.
Proceed to check / un-check (depending on your Access Control Method) the features that the new role is going to have access to.
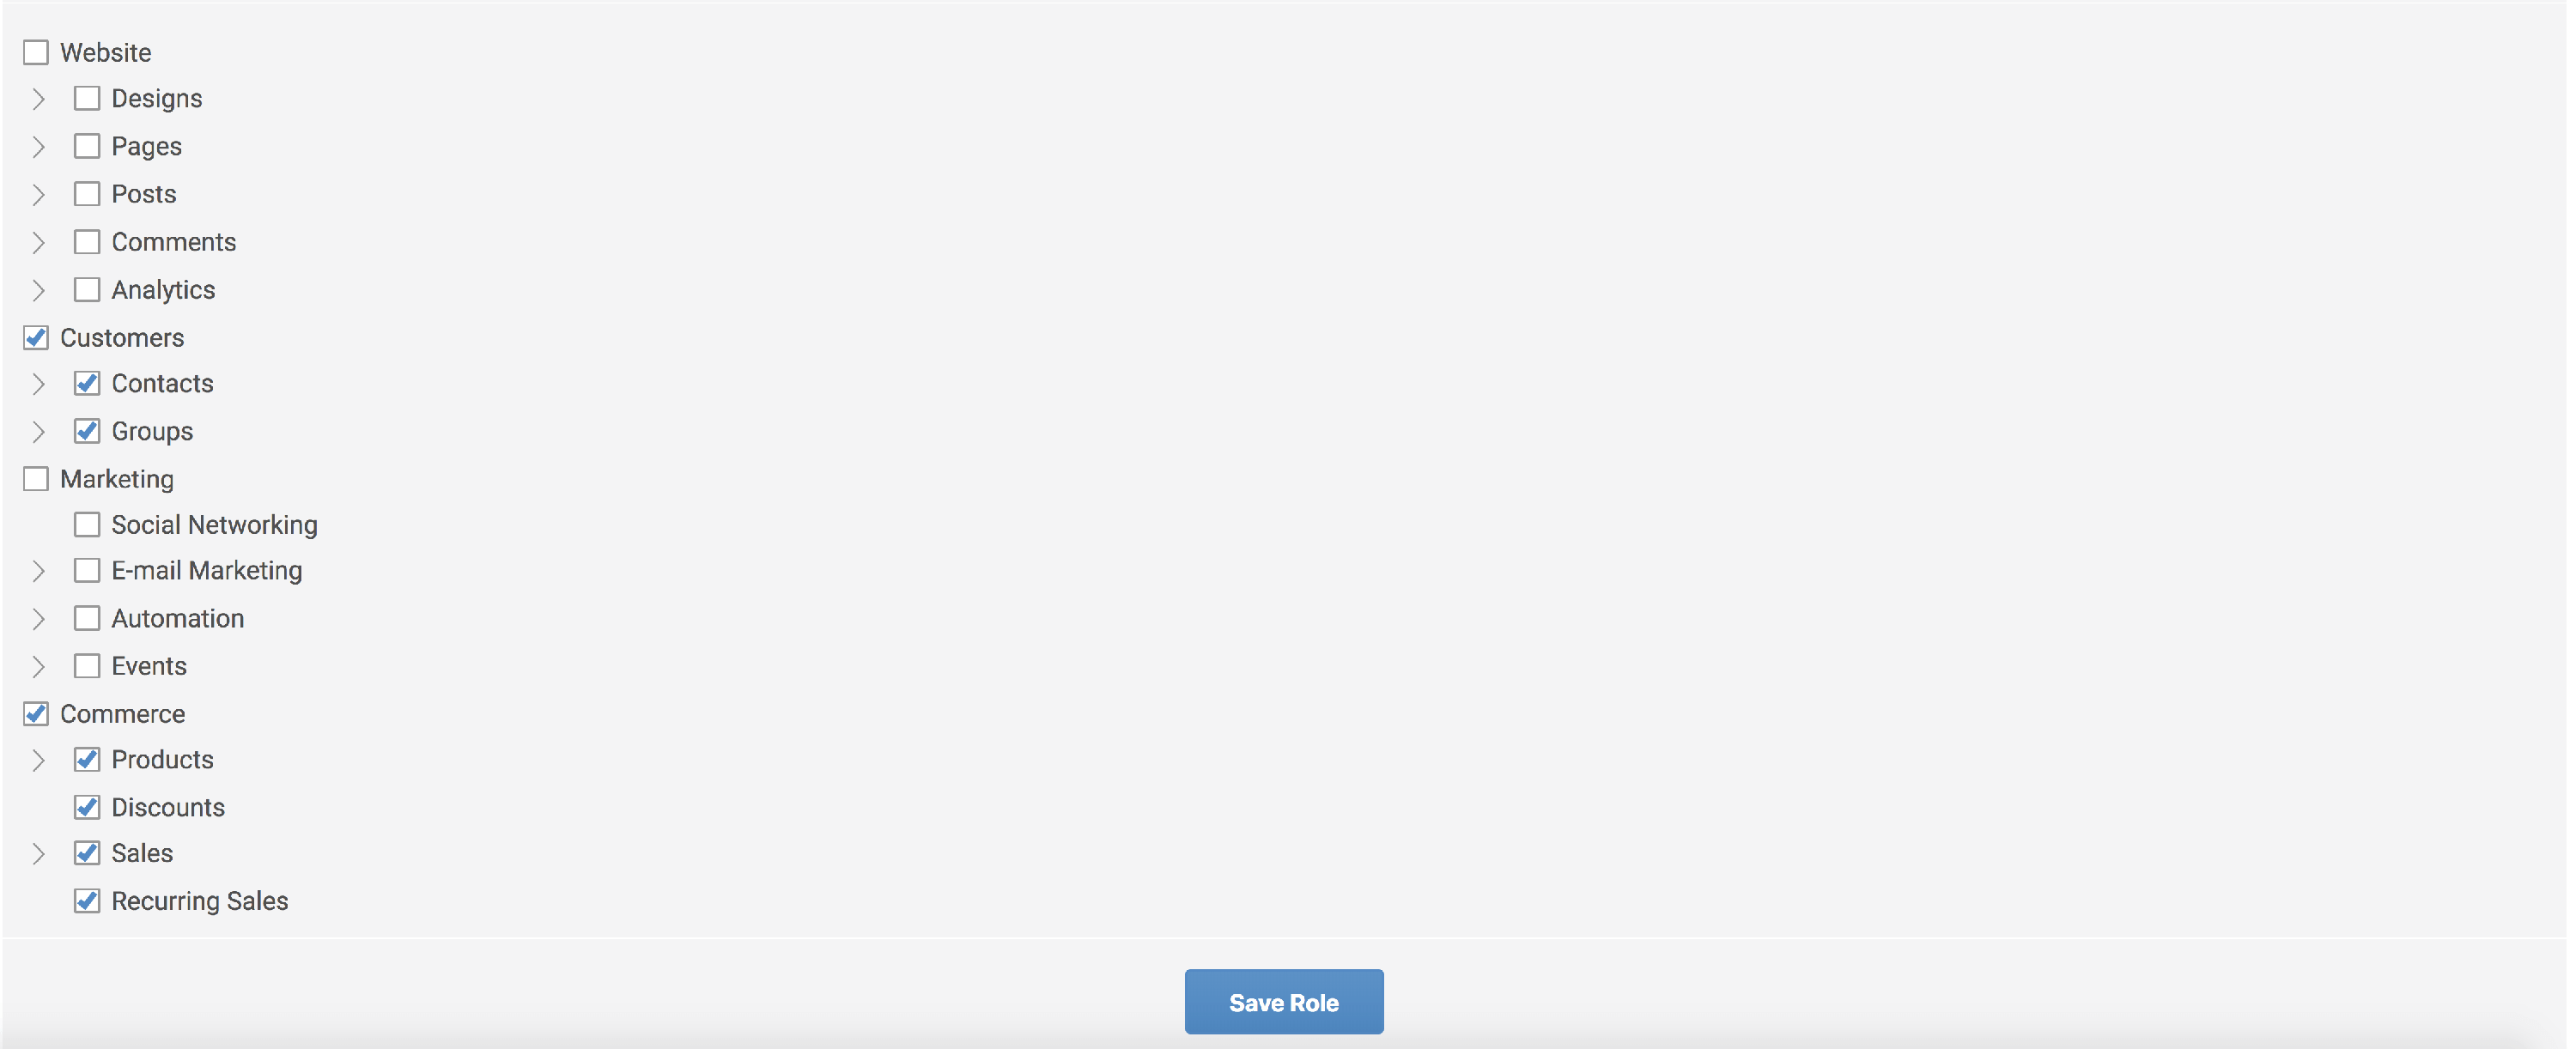
When you are happy with the access you have provided the role with, Click the "Save Role" button at the bottom of the screen.