
-
Website
-
3min Explainer Walkthrough

- Generate a Design
-
Page Management

-
Page Editing

-
Form Builder

- Updating Your Navigation Menu
- Creating Page Redirectors
- Posts Management
-
Search Engine Optimization

- Setting Up Google Marketing Tools
- Setting Up Meta Pixel & E-commerce Tracking
- Setting Up Microsoft Marketing Tools
- Setting Up Linkedin Insight Tag
- Optimizing Images For Web
-
Analytics

- Third Party Embed Code
-
3min Explainer Walkthrough
- Contacts
- Marketing
- Commerce
- Apps
-
Settings and Config
- Going Live
- Billing
- Domain Health Checker
- Managing Administrators
- Registering a Domain Name
- Changing Your Domain Name
- The Role Of DNS Records Explained
- Backing Up Your Website
- Choosing an E-mail Host
- Hosting Email With Oncord
- Setting Up Gmail Hosting
- Setting Up Office 365 Hosting
- Setting Up Sub Domains
- Hosting a Sub-Site
Events Additional Options & Reminders
After creating a new event, Oncord provides a range of additional tools to help you manage and promote it effectively. These options are accessible directly within your event dashboard and allow you to customise communications, prepare event materials, and track attendees.
To access these options:
- Navigate to Dashboard > Marketing > Events.
- Click the newly created event.
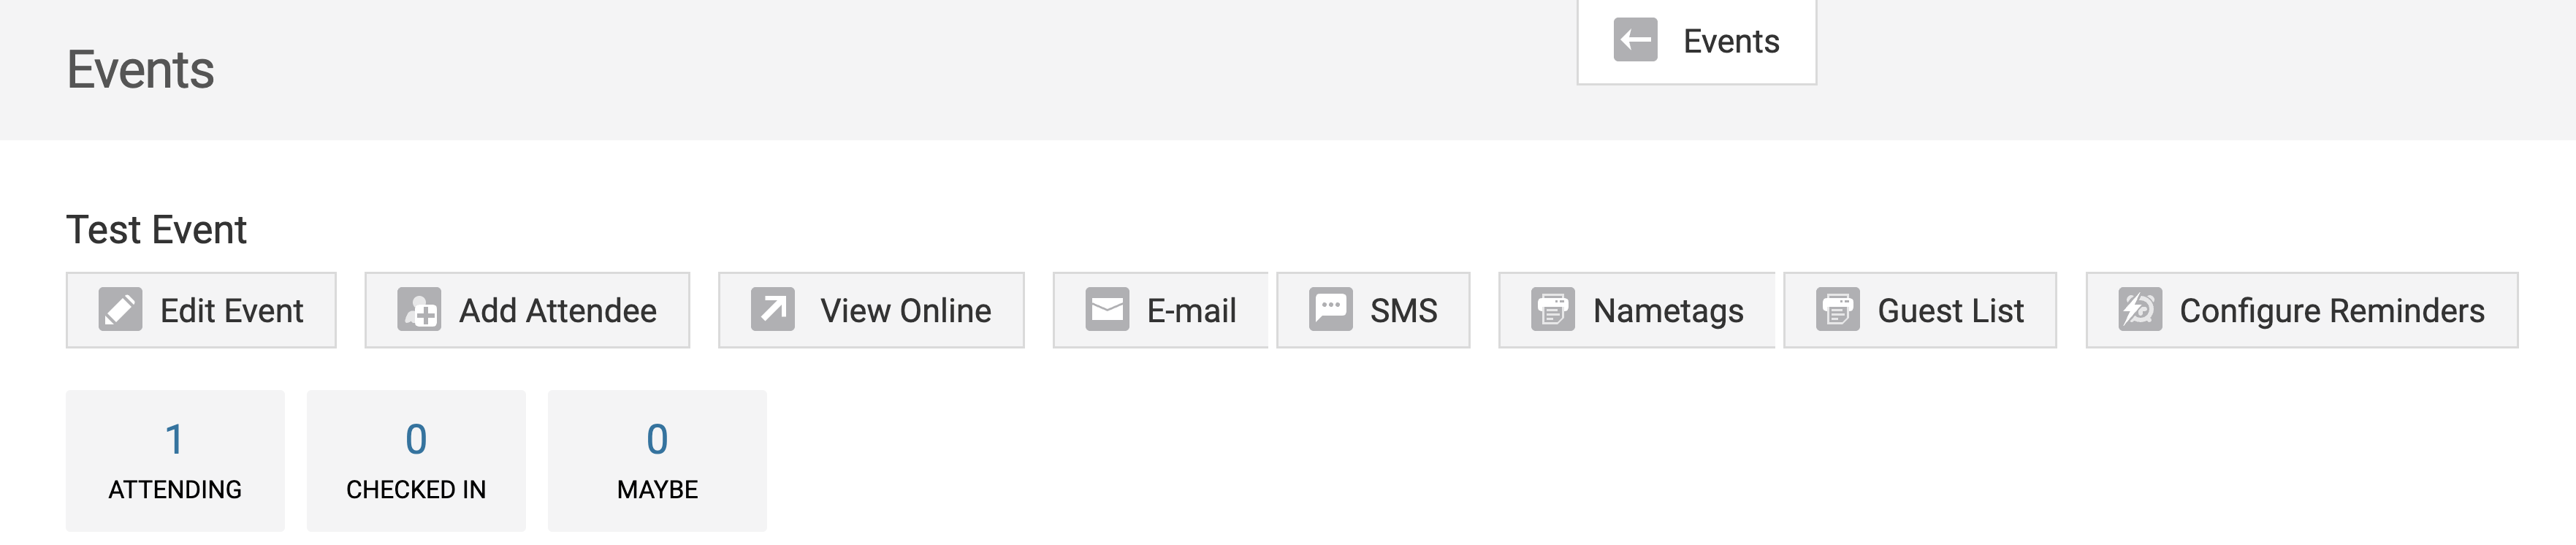
Under the Event heading, you’ll see several management options:
- Edit Event: Update the basic event details you originally configured when creating the event.
-
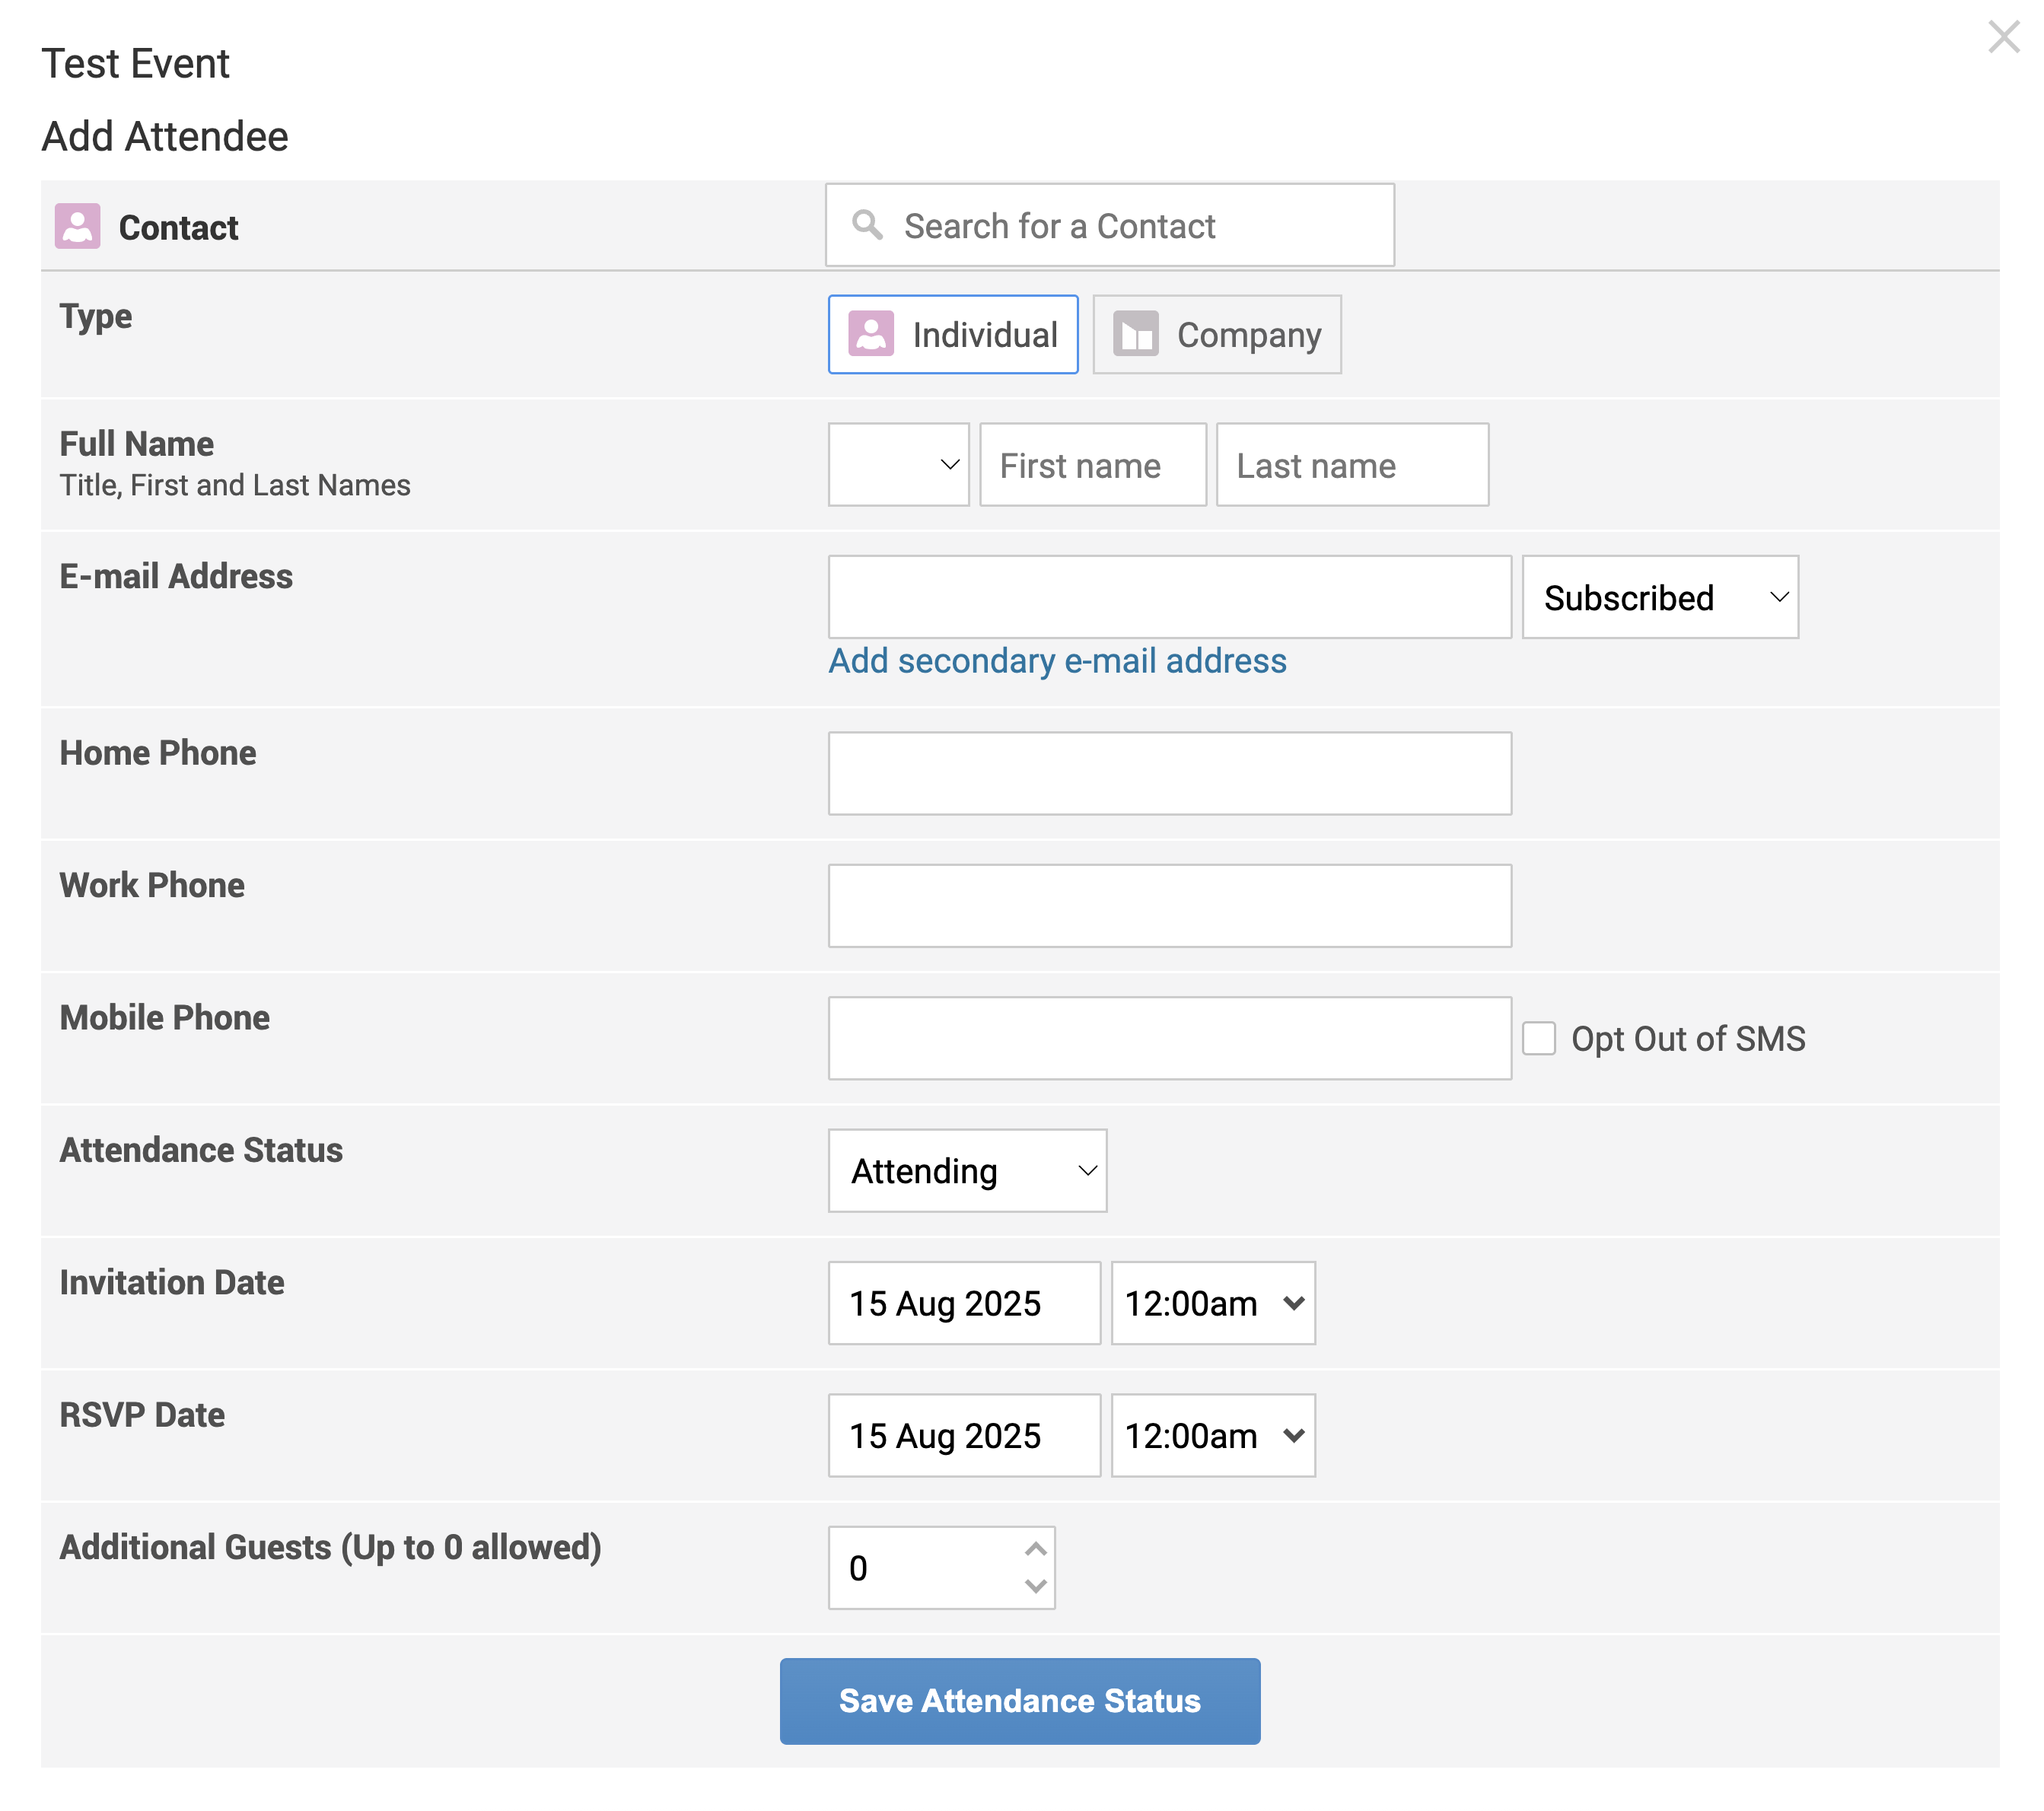
Add Attendee: Add attendees manually or from your existing contact list.
- Search for an existing contact, or manually enter attendee details.
- Set Attendance Status, Invitation & RSVP Date, and Additional Guests.
- Note: When you manually enter an attendee’s details, they will be saved to your Contacts for future use.
- Search for an existing contact, or manually enter attendee details.
- View Online: View your Event RSVP page in a browser. You can also use this link to promote the event.
-
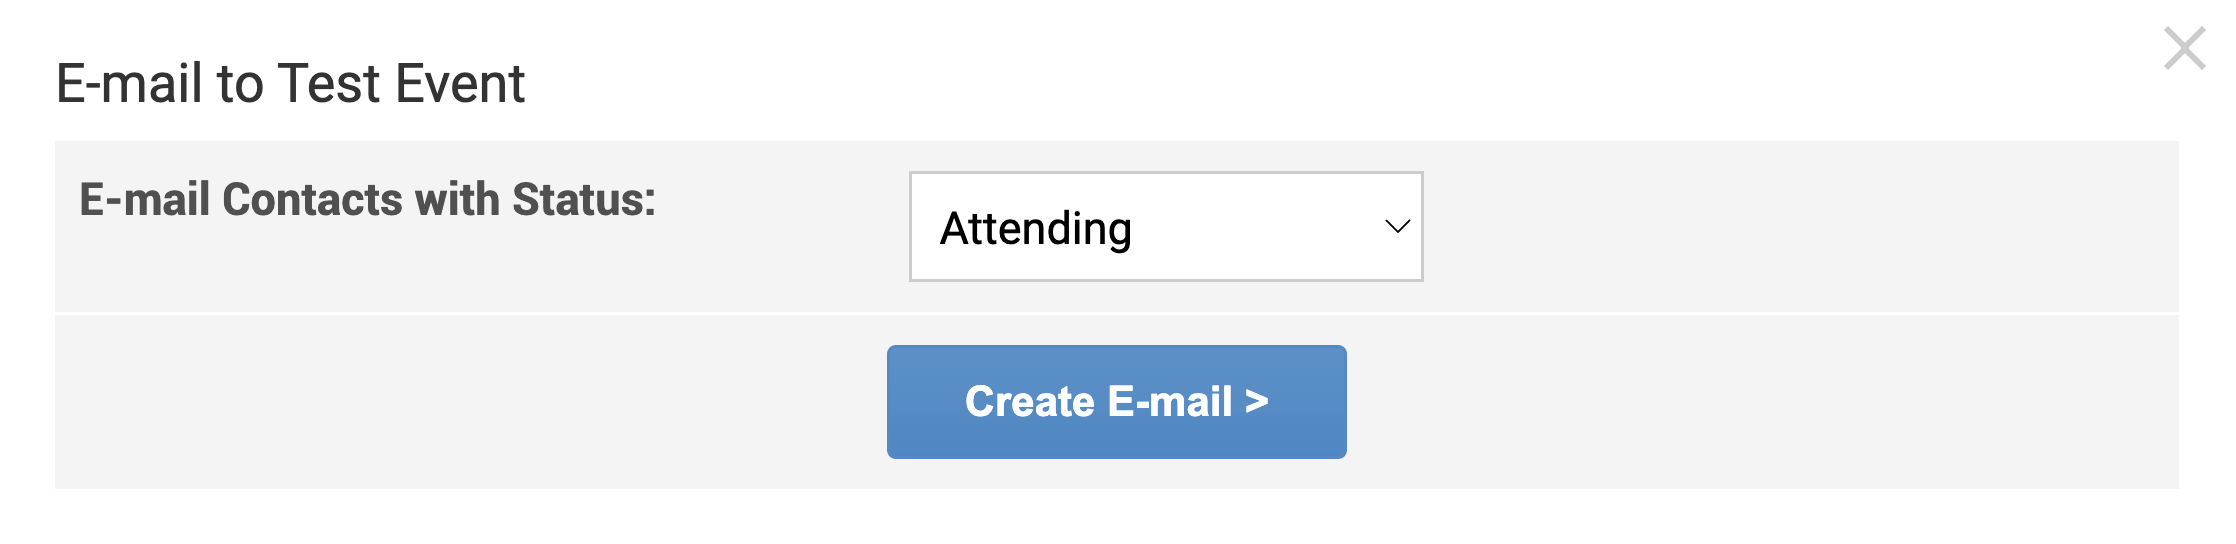
E-mail: Send customised emails to contacts based on their RSVP status.
- Click the E-mail option.
- Select the RSVP status you’d like to target (e.g., Attending, Maybe, No RSVP).
- Click Create E-mail.
- For detailed steps on email design and sending, refer to our Email Marketing Help Guide.
-
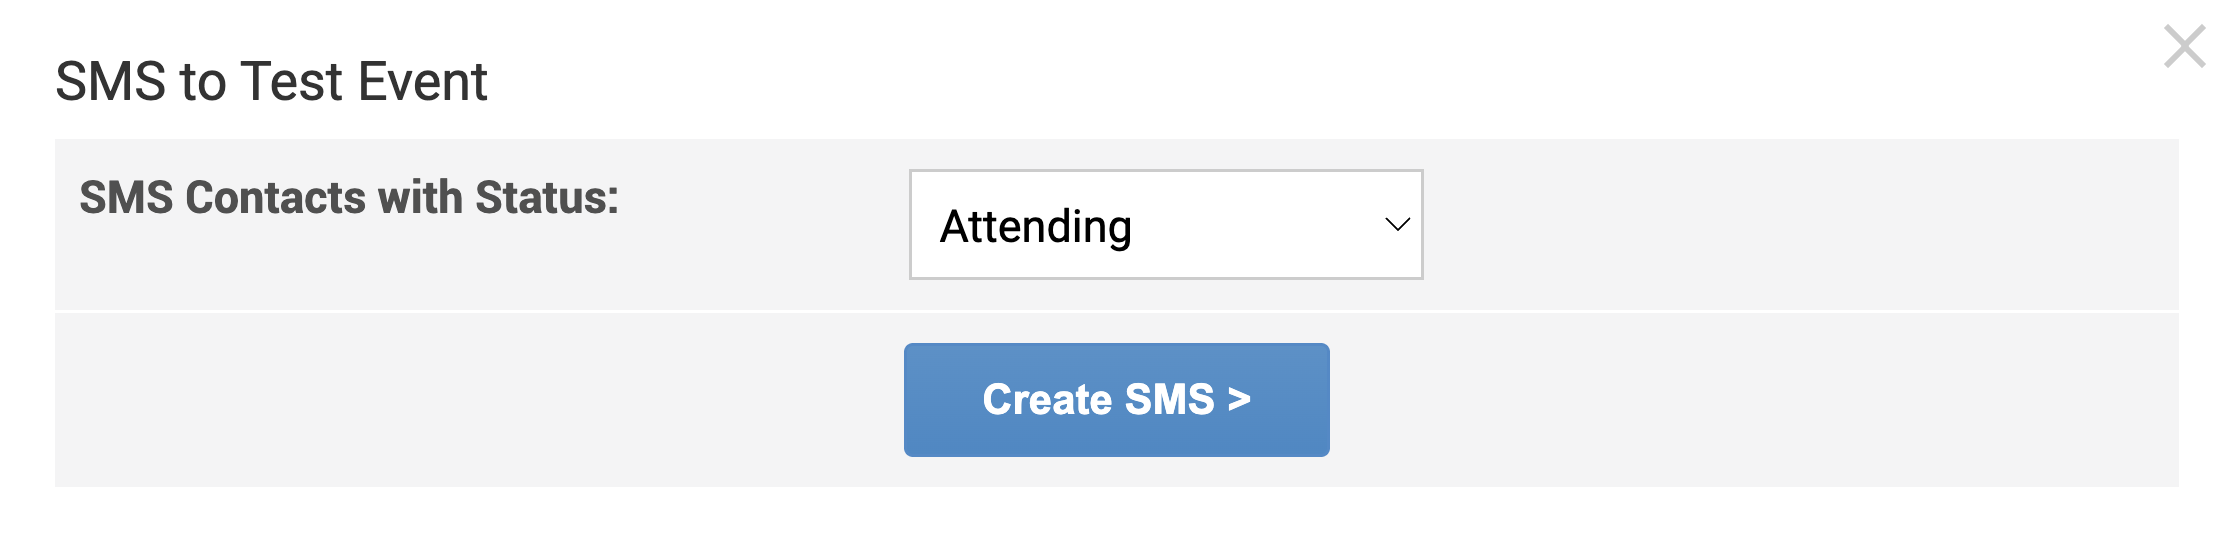
SMS: Send customised SMS messages to attendees or invitees based on RSVP status.
- Click the SMS option.
- Select the desired RSVP status.
- Click Create SMS.
- For more on SMS campaigns, visit our SMS Marketing Help Guide.
- Click the SMS option.
-
Nametags: Easily create and print professional nametags for attendees.
- Click the Nametags option.
- Select which Attendance Status to include (Attending, Maybe, Not Attending, No RSVP).
- (Optional) Filter by group.
- Choose your Nametag Template.
- Click Create Nametags PDF to generate the file.
- Click the Nametags option.

-
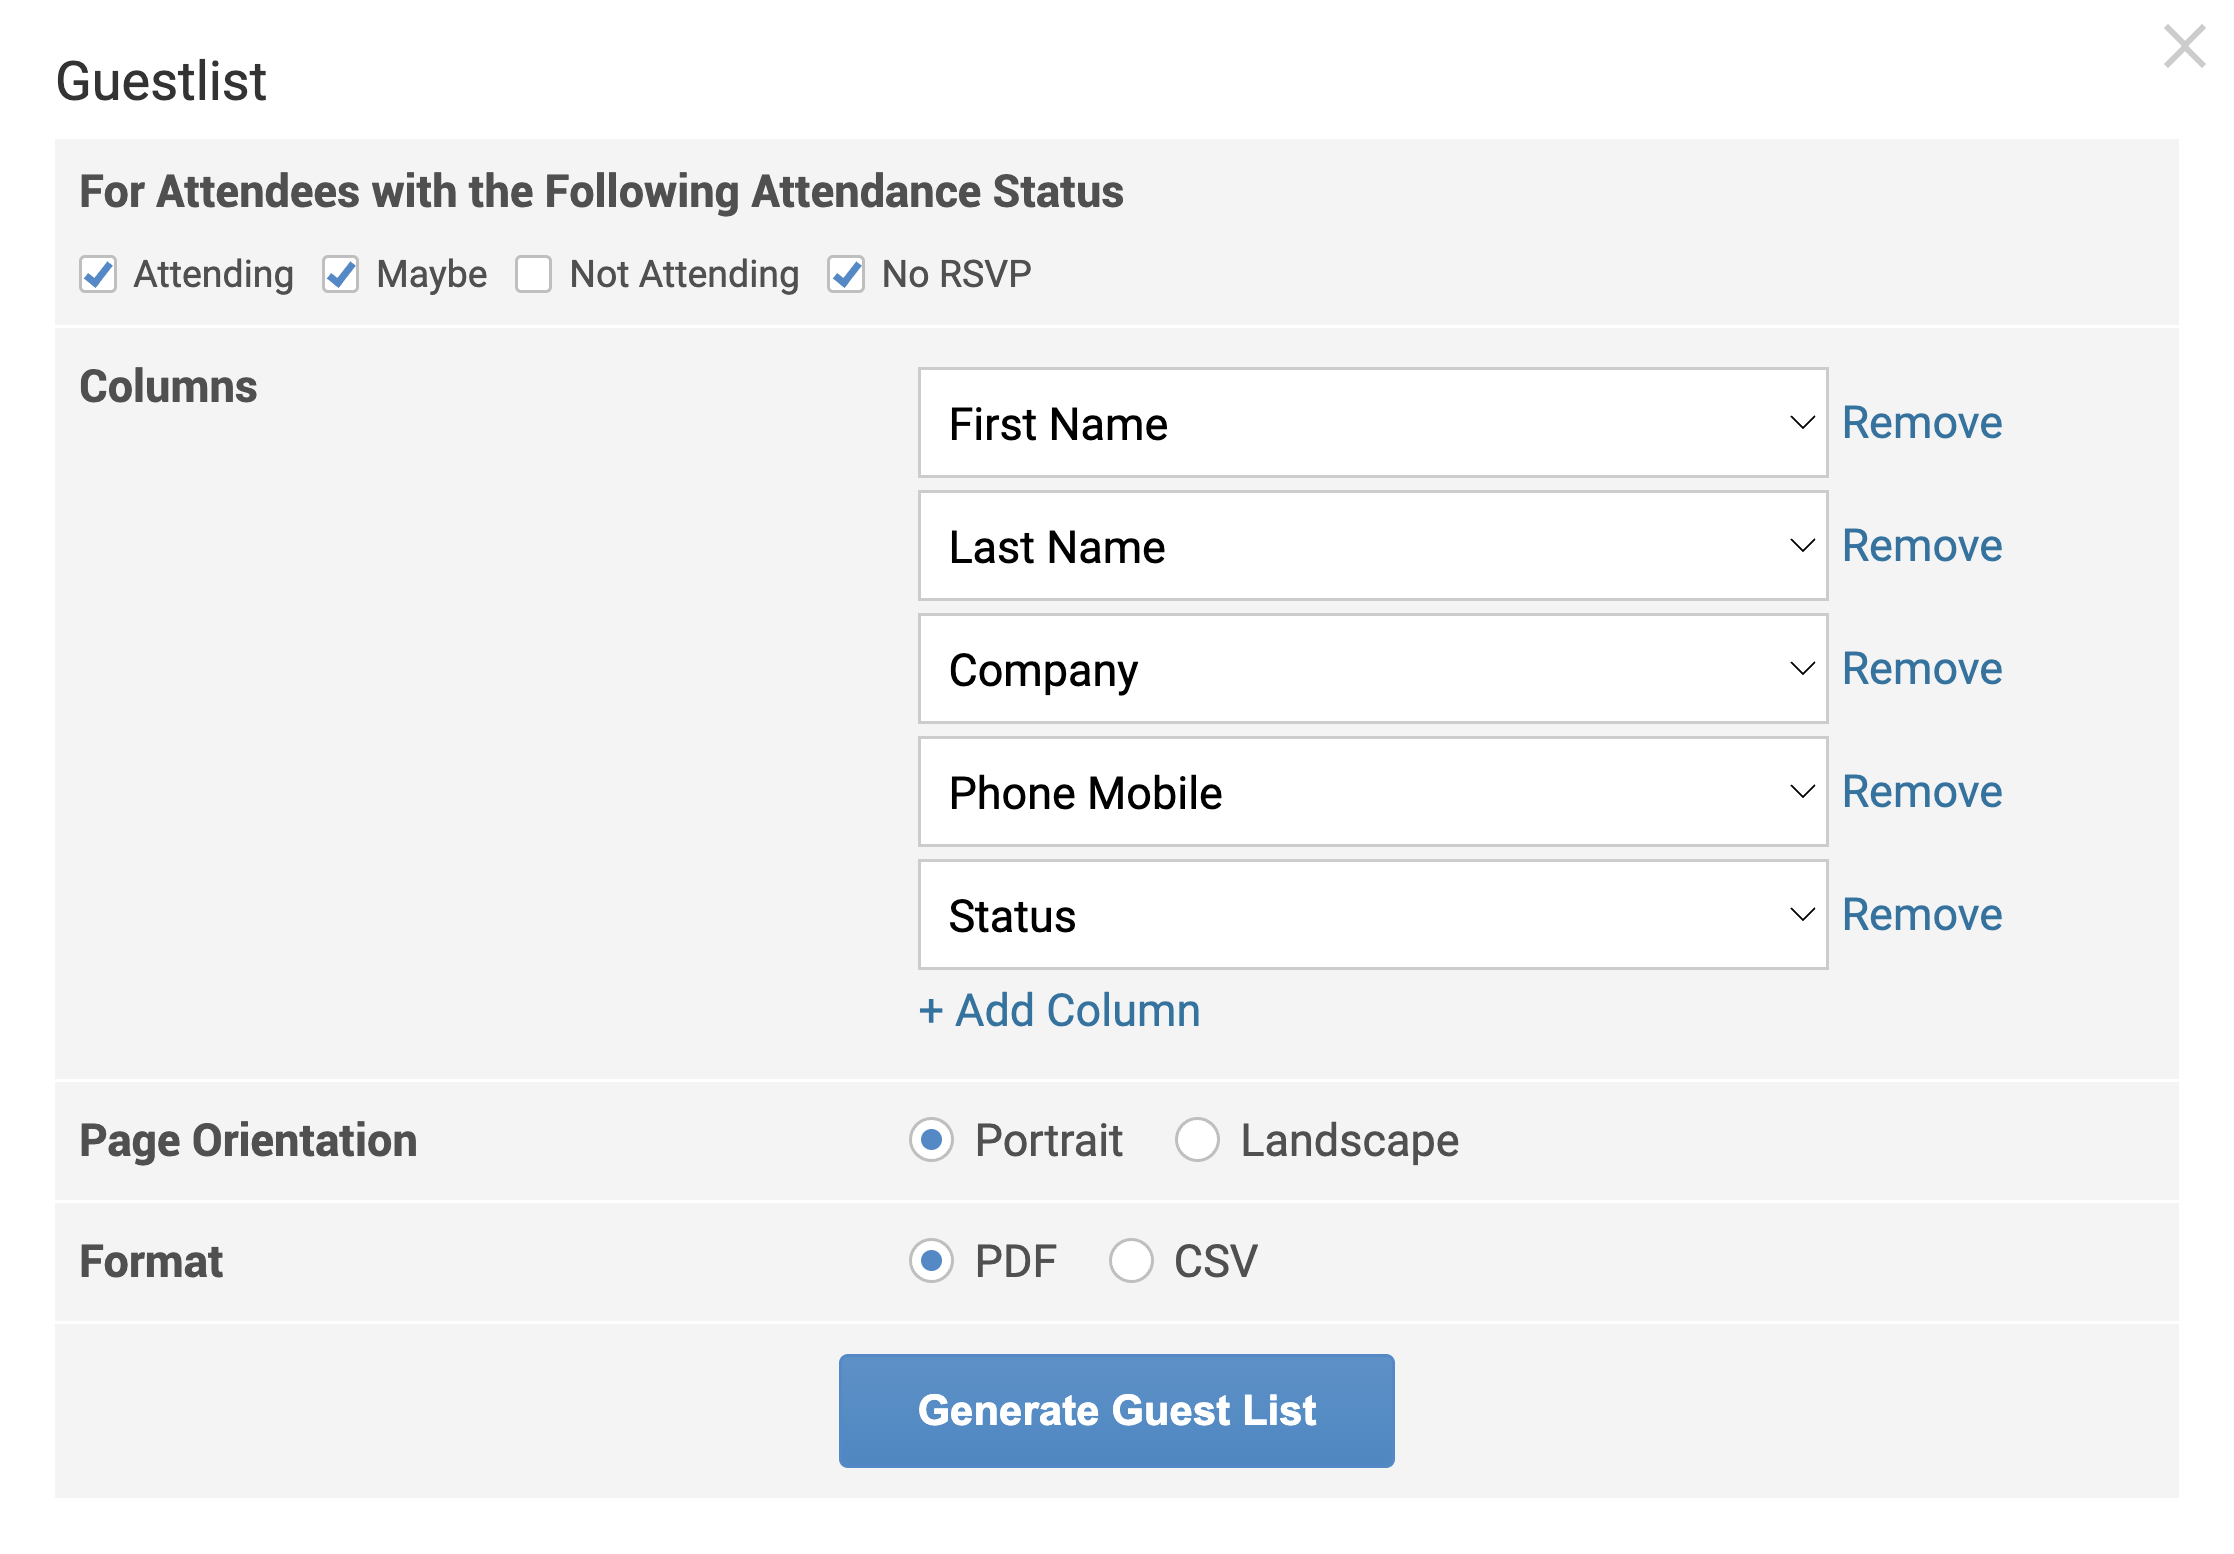
Guest List: Generate a guest list for event staff or check-in purposes.
- Click the Guestlist option.
- Choose which Attendance Status to include.
- Add or remove columns such as Name, Company, Mobile Number, or Status etc.
- Select Page Orientation (Portrait or Landscape).
- Choose PDF or CSV format.
- Click Generate Guest List to create the file.
- Click the Guestlist option.
Configure Reminders
Click the Configure Reminders option to set up automated email or SMS reminders for your event. Oncord provides three types of reminders:
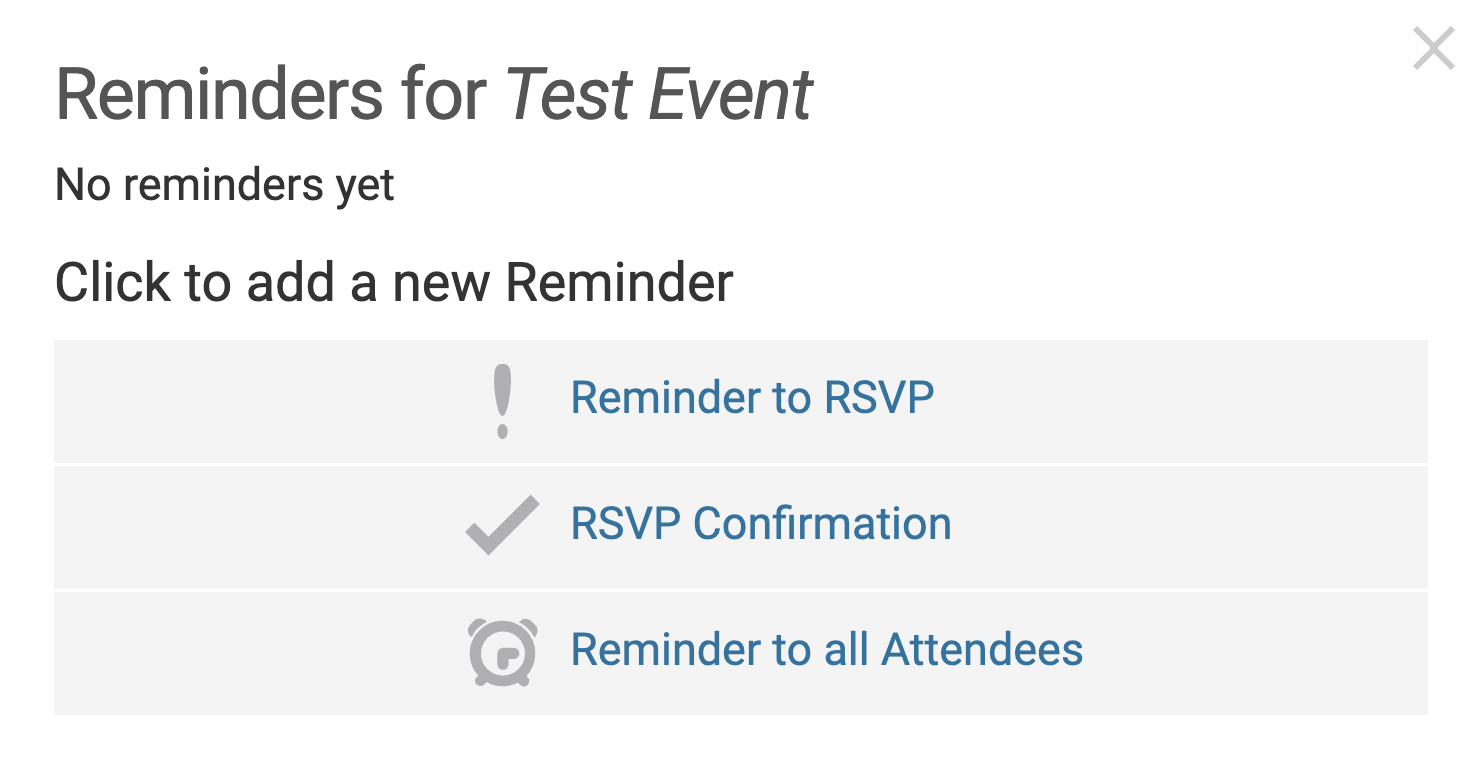
-
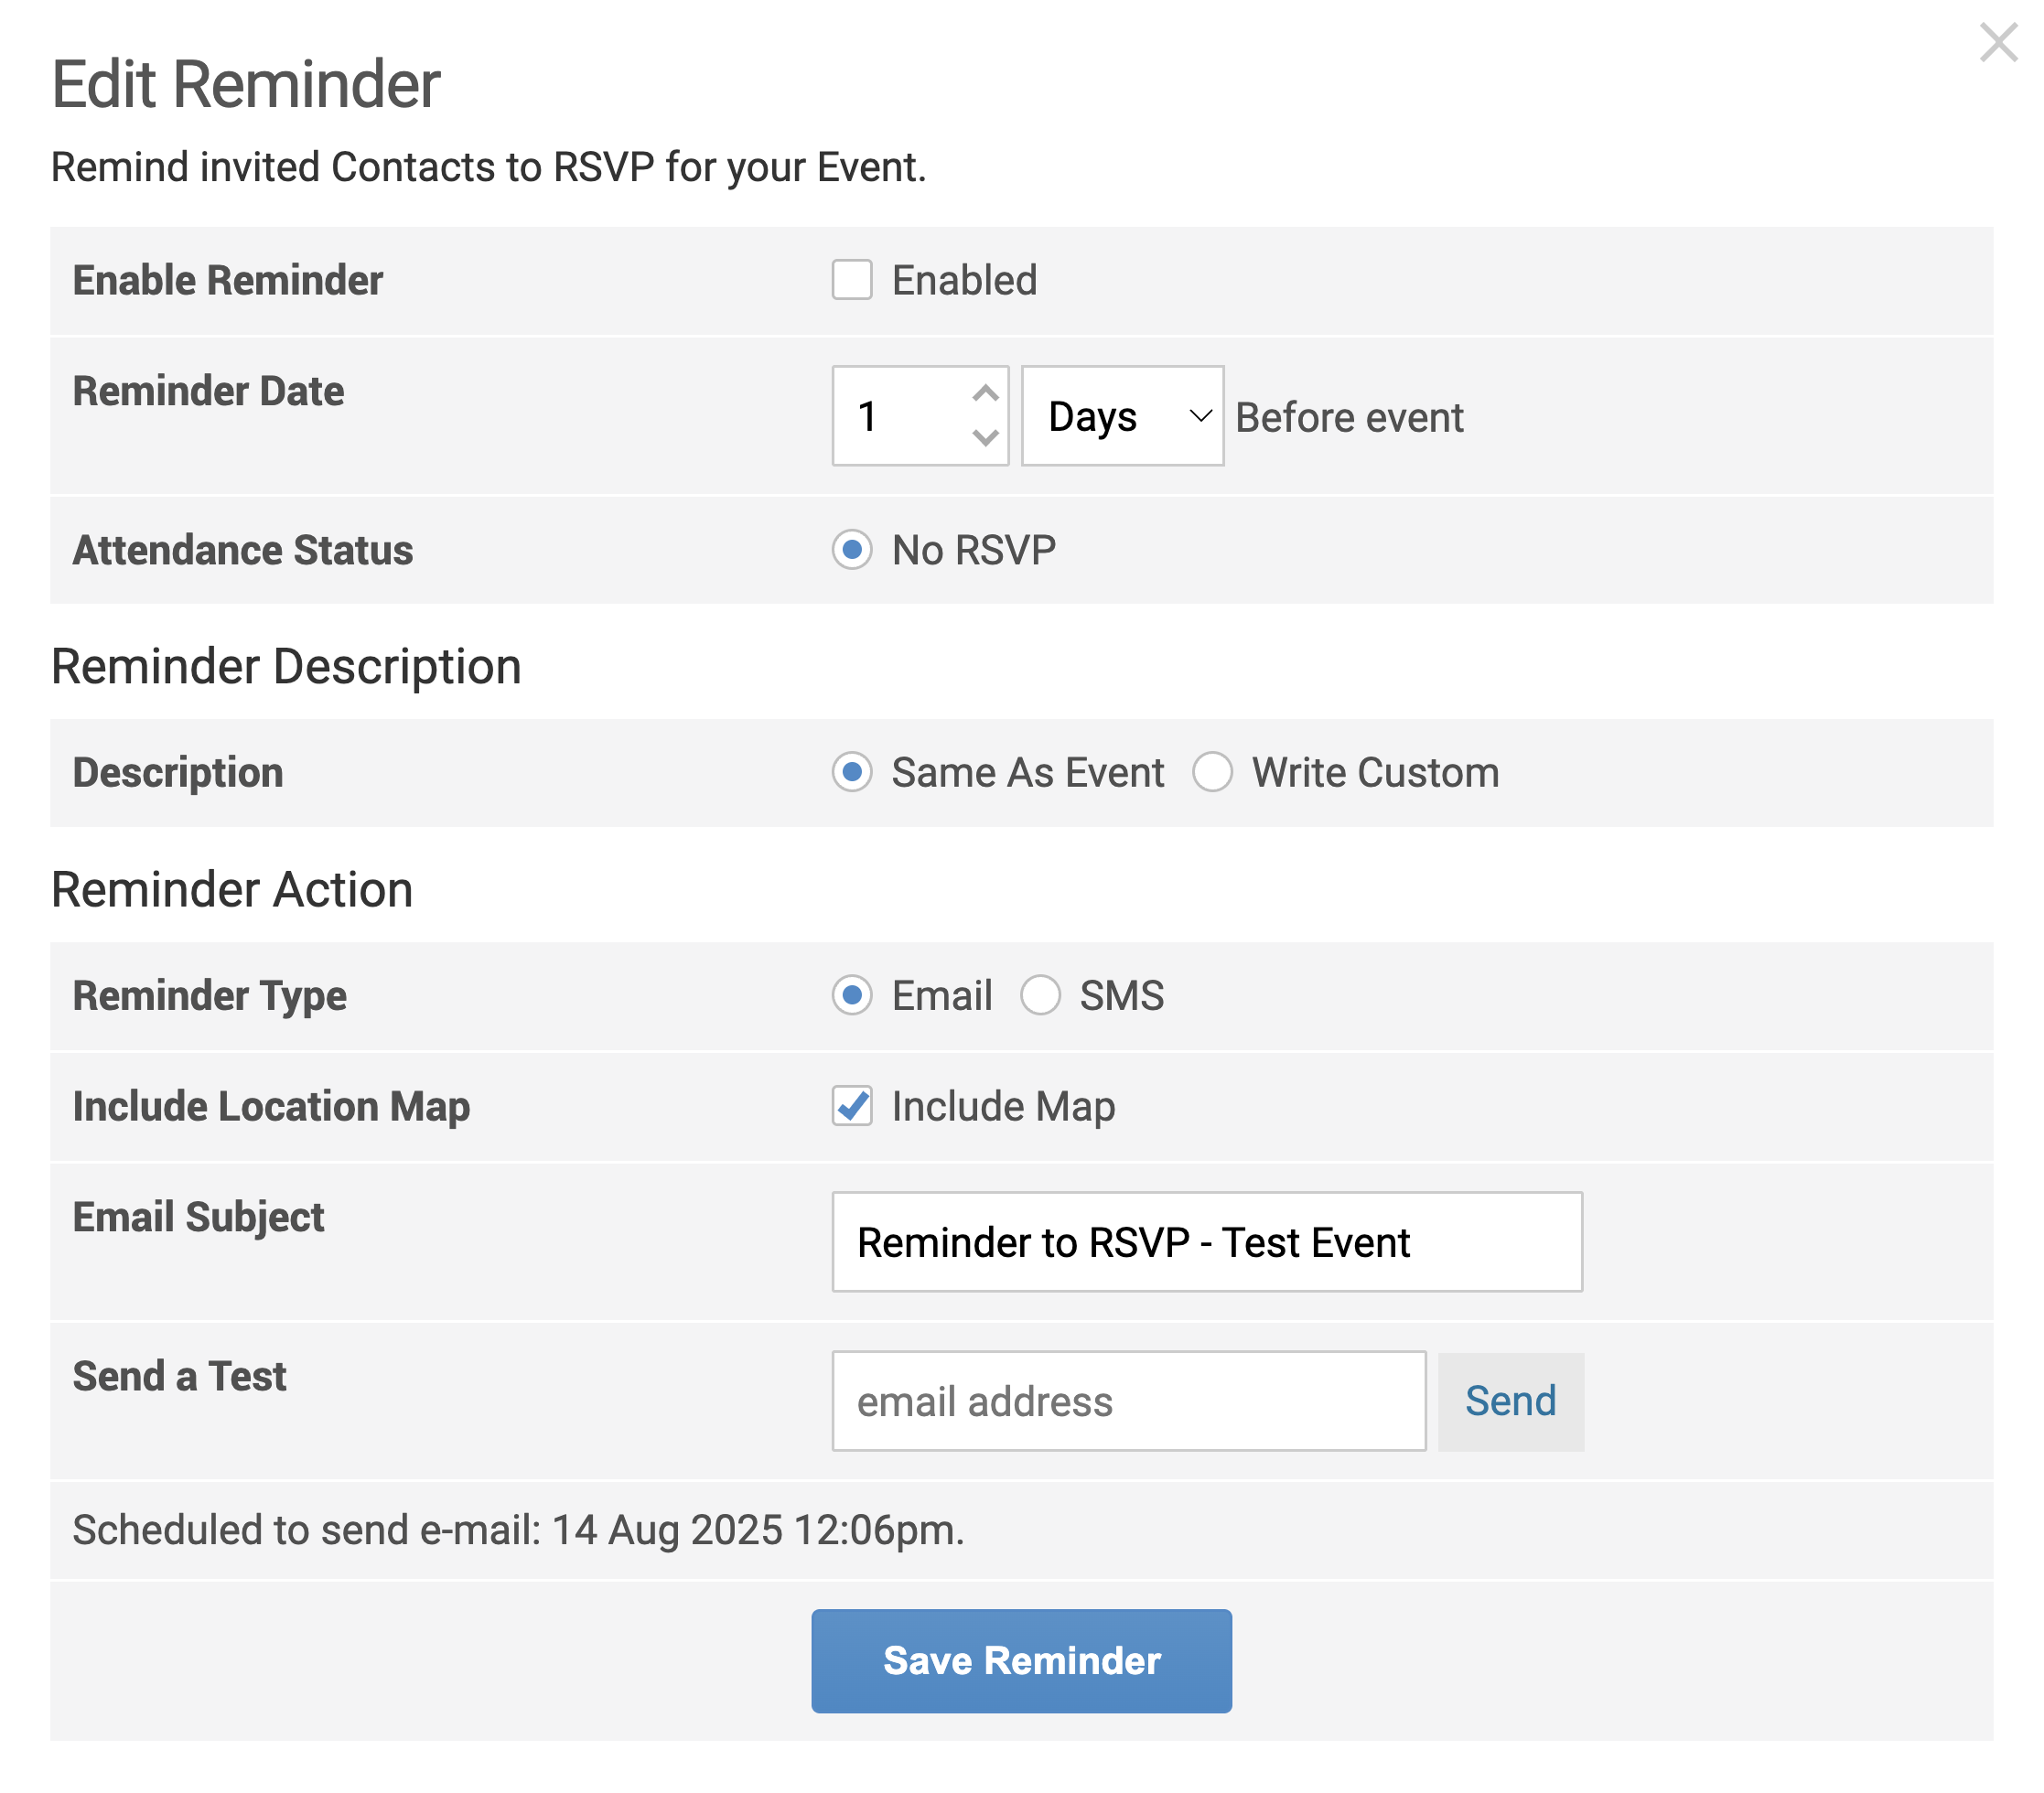
Reminder to RSVP: Send a follow-up to contacts who have not yet responded to your invitation.
- Enable Reminder: Turns the reminder on or off.
- Reminder Date: Set how many days before the event the reminder should be sent.
- Attendance Status: Select No RSVP to target only those who haven’t responded.
- Description: Use the event’s original description or write a customised message.
- Reminder Type: Decide between an Email or SMS, depending on your preferred channel.
- Include Location Map: Optionally include a map of the event location to help guests find the venue.
- Email Subject: Edit the subject line as needed.
- Send a Test: Preview the message before it’s sent to ensure formatting and details are correct.
-
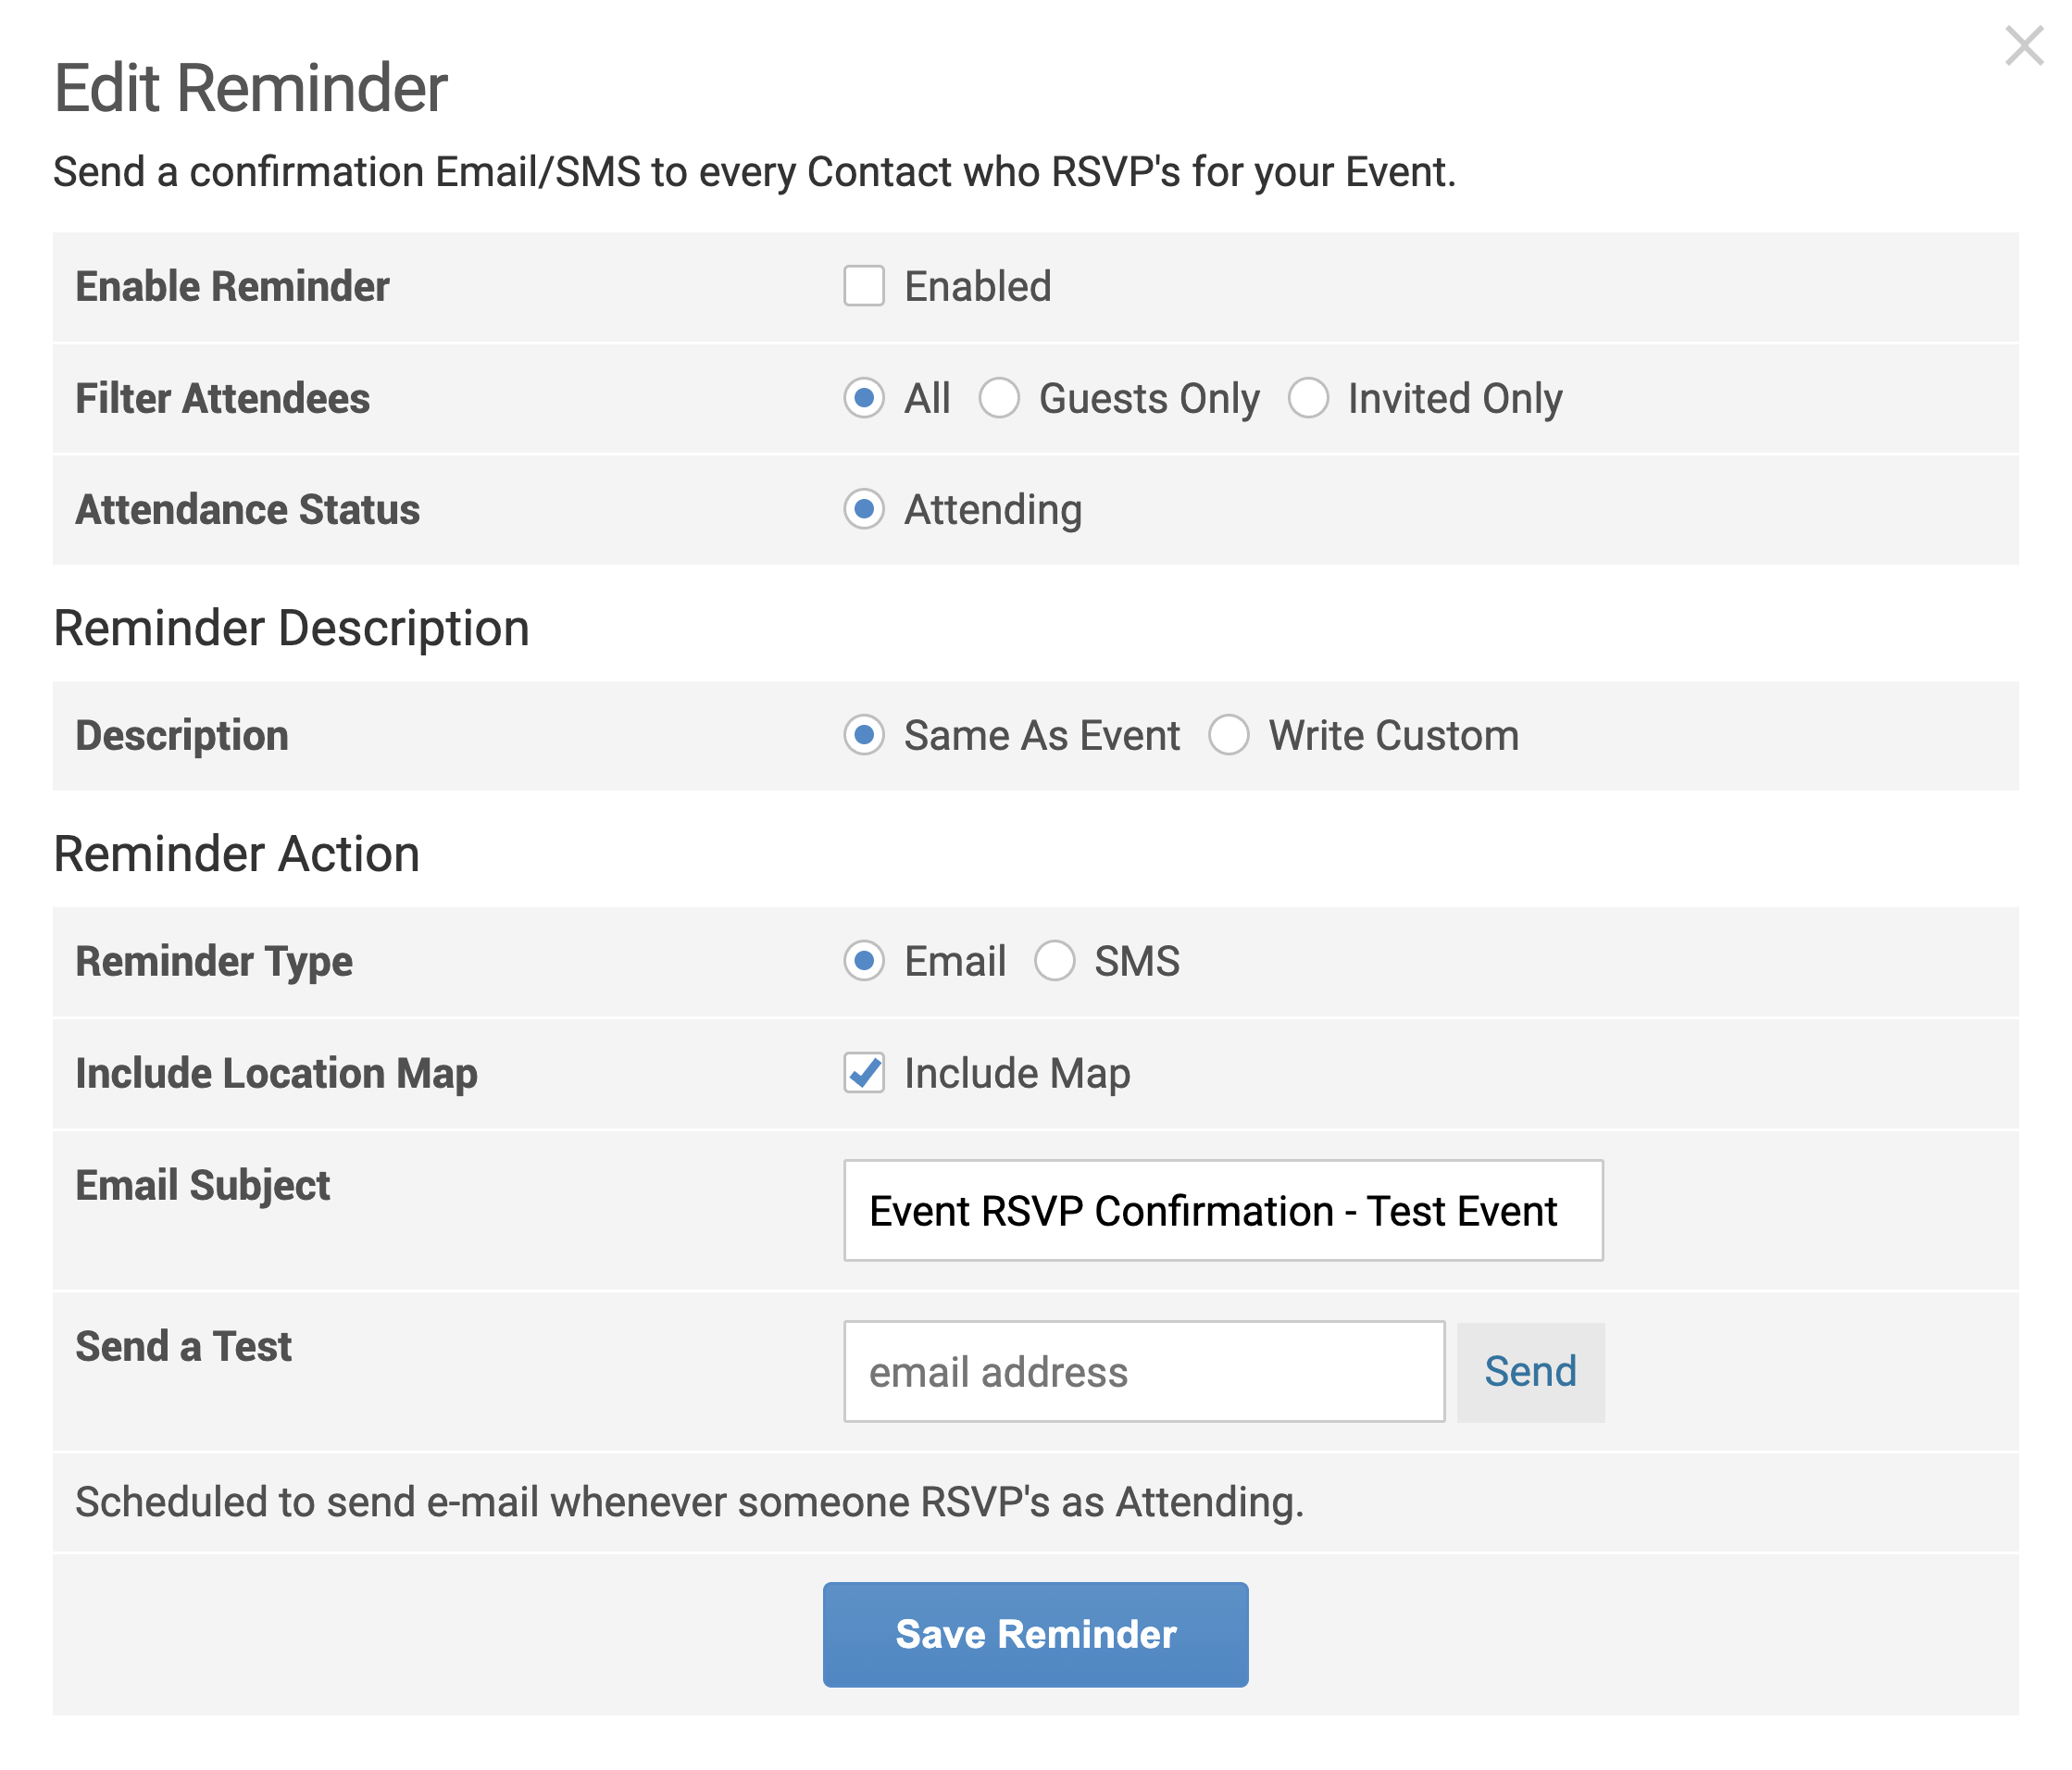
RSVP Confirmation: Send an immediate confirmation when someone RSVPs as attending.
- Enable Reminder: Turns the reminder on or off.
- Filter Attendees: Target all respondents, only their guests, or only those directly invited.
- Attendance Status: Trigger the confirmation only for confirmed attendees.
- Description: Use the event’s original description or write a customised message.
- Reminder Type: Decide between an Email or SMS, depending on your preferred channel.
- Include Location Map: Optionally include a map of the event location to help guests find the venue.
- Email Subject: Edit the subject line as needed.
- Send a Test: Preview the message before it’s sent to ensure formatting and details are correct.
-
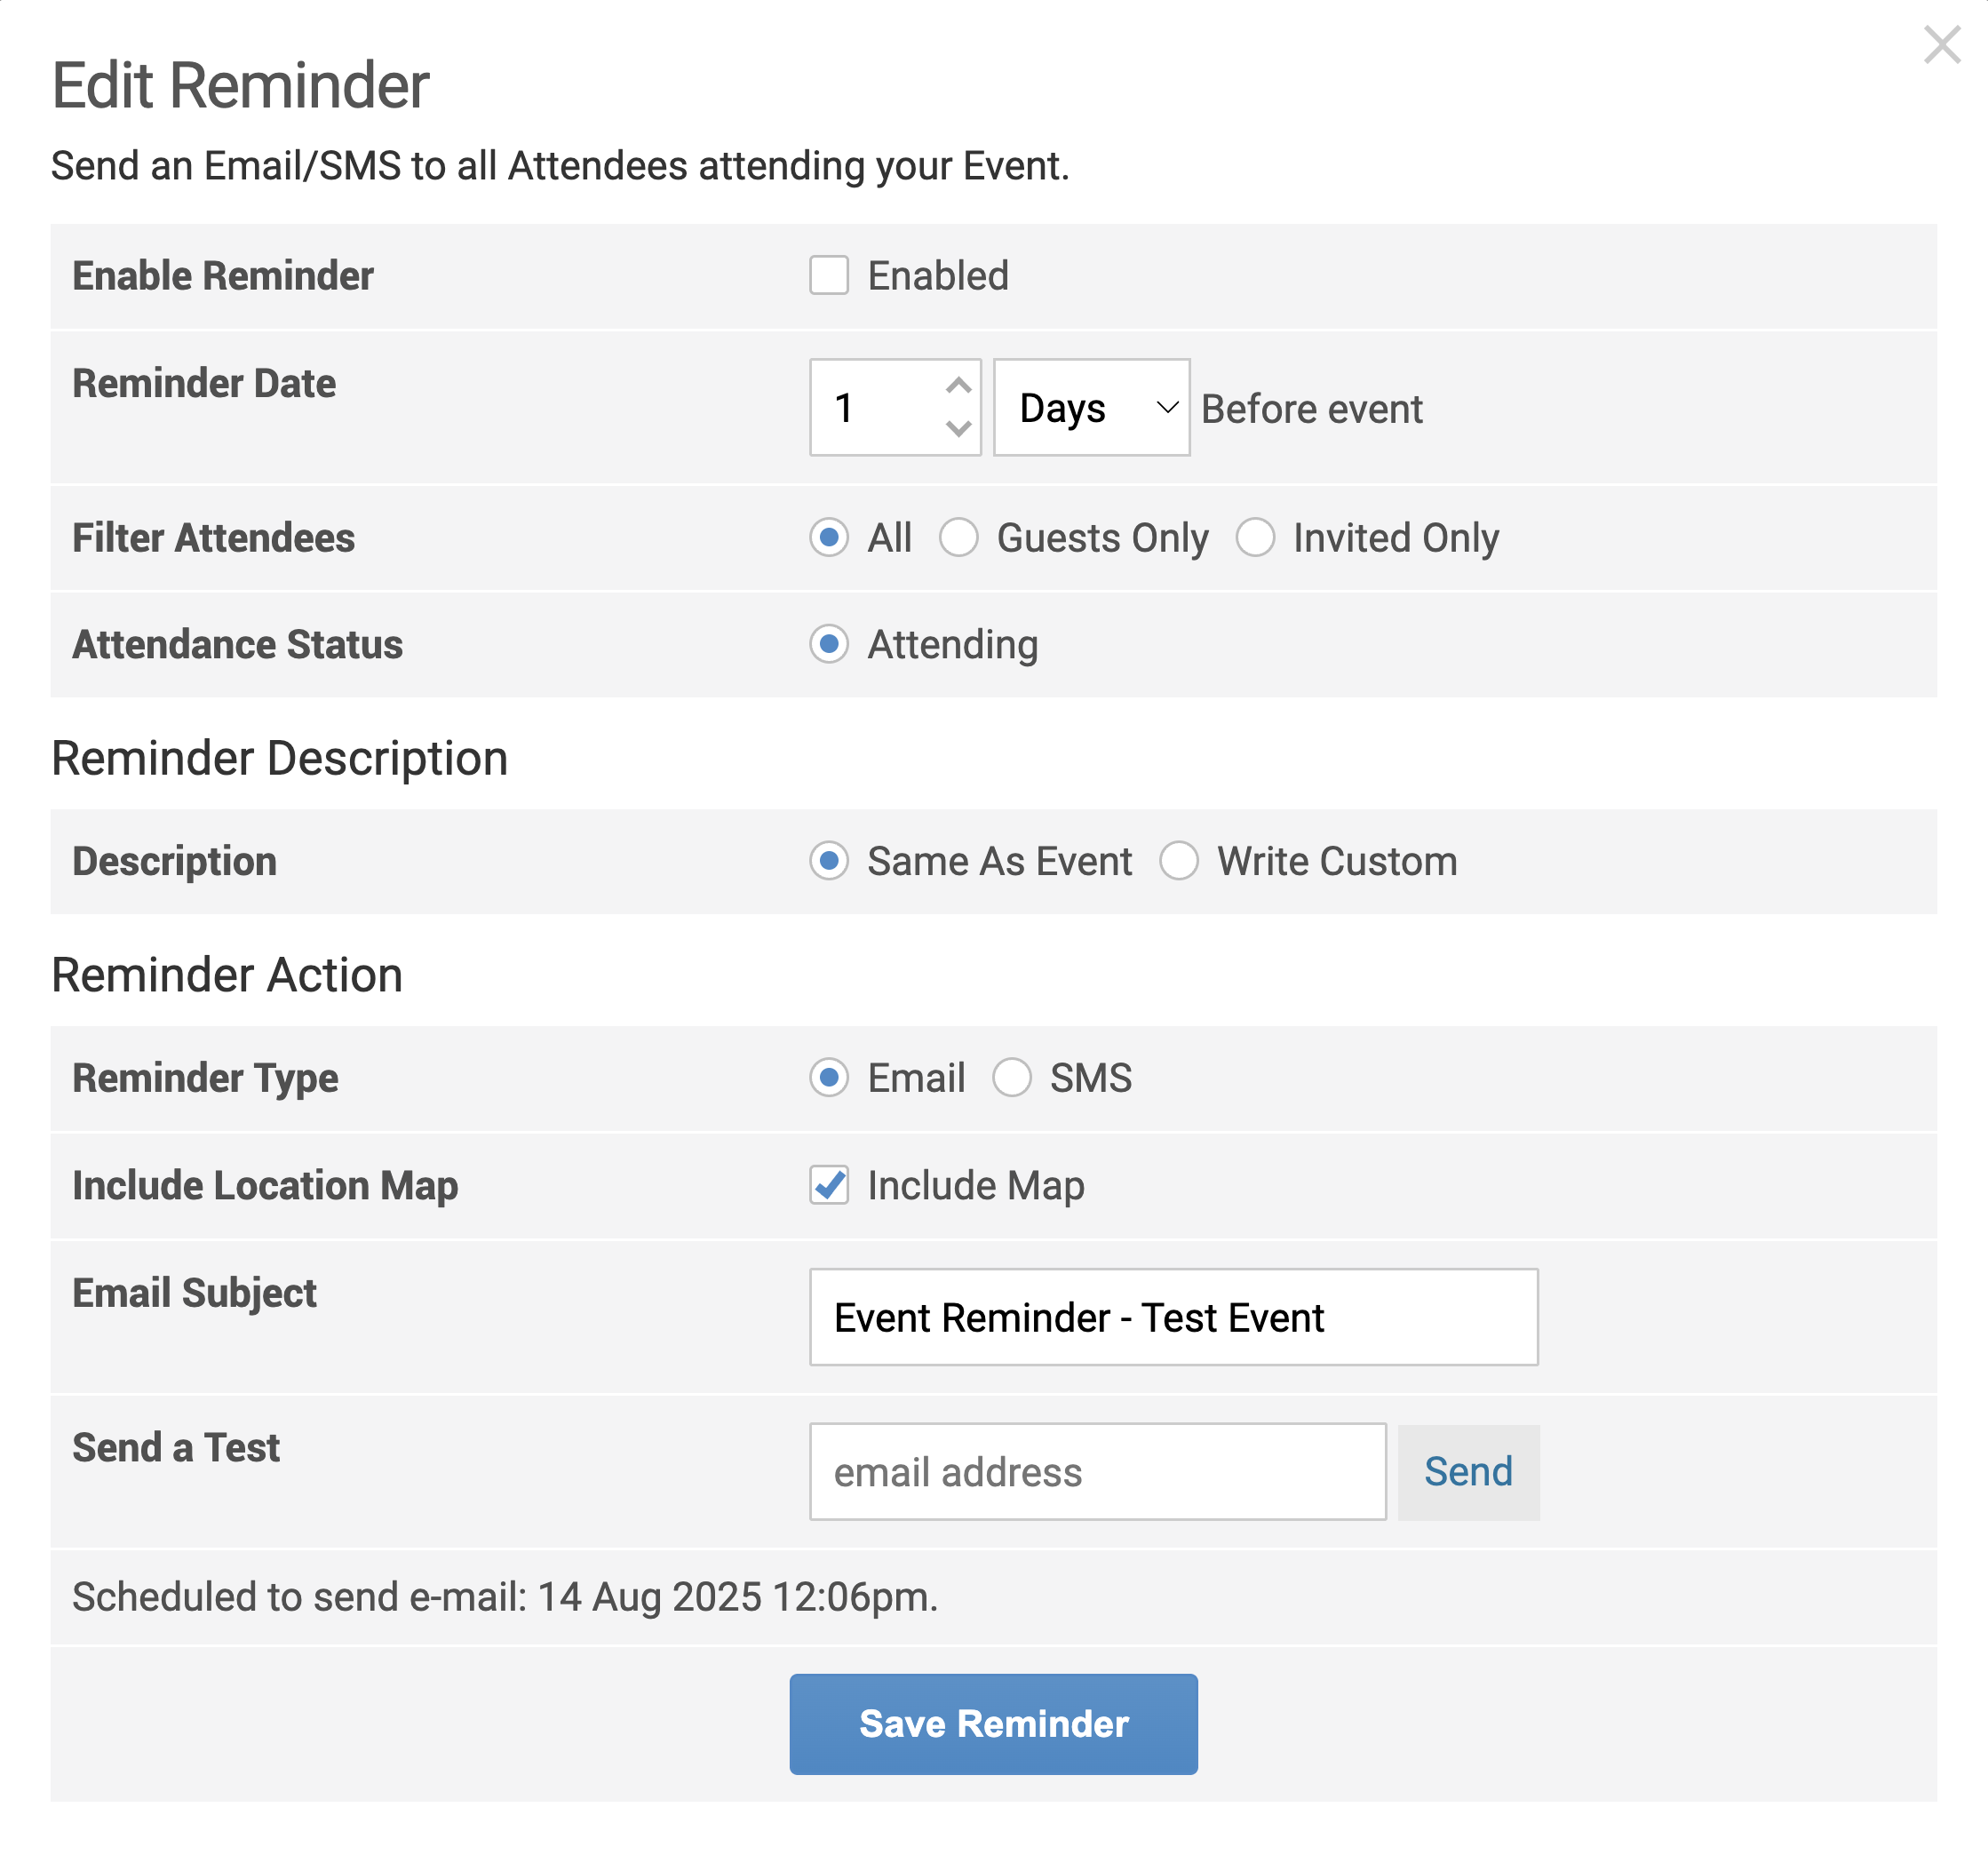
Reminder to all Attending: Send a final reminder to attendees shortly before the event.
- Enable Reminder: Turns the reminder on or off.
- Reminder Date: Set how many days before the event the reminder should be sent.
- Filter Attendees: Target all confirmed attendees, guests only, or invited-only lists.
- Attendance Status: Trigger the confirmation only for confirmed attendees.
- Description: Use the event’s original description or write a customised message.
- Reminder Type: Decide between an Email or SMS, depending on your preferred channel.
- Include Location Map: Optionally include a map of the event location to help guests find the venue.
- Email Subject: Edit the subject line as needed.
- Send a Test: Preview the message before it’s sent to ensure formatting and details are correct.
Oncord’s event tools make it easy to manage invitations, track attendees, and send timely reminders all from one platform. With everything
in one place, running a smooth, well-organised event is simpler than ever.