-
Website
-
3min Explainer Walkthrough

- Generate a Design
-
Page Management

-
Page Editing

-
Form Builder

- Updating Your Navigation Menu
- Creating Page Redirectors
- Posts Management
-
Search Engine Optimization (SEO)

- Setting Up Google Marketing Tools
- Setting Up Meta Pixel & E-commerce Tracking
- Setting Up Microsoft Marketing Tools
- Setting Up Reddit Pixel and E-commerce Tracking
- Setting Up Linkedin Insight Tag
- Optimizing Images For Web
-
Analytics

- Third Party Embed Code
- Special Files
- Setting Up OpenAI Ads Manager
-
3min Explainer Walkthrough
- Contacts
- Marketing
- Commerce
- Apps
- Settings and Config











Checking In Event Attendees
Checking in attendees is optional and helps you record who attended. Check-in does not verify payment or require a previous RSVP, so check the attendee’s booking and payment status separately when needed.
Once attendees are checked in, you’ll be able to:
- Differentiate between contacts who attended your event, and contacts who RSVP'd.
- Segment your marketing campaigns (e-mail or SMS) to target only attendees who checked in, rather than everyone who RSVP’d.
There are two ways to check in attendees: manually or by scanning a QR code.
Manually Checking In Attendees
You can manually check in attendees from the Event Front Desk or directly from the Event Dashboard.
Check in from the front desk
- Go to Dashboard > Marketing > Events.
- Select your event.
- Click Front Desk.
- Enter the attendee’s name, email, or reference code (6-character uppercase).
- Click Check-In next to the attendee.
Check in from the event dashboard
- On the Event Dashboard, search for the attendee.
- Click the three-dot menu next to their name.
- Select Check-In Attendee.
If you need to reverse this, select Undo Check-In.
Checking In Attendees via QR Code
The QR code check-in feature helps reduce time spent checking-in attendees at events. When enabled, a unique QR code is included in the events reminder sent to attendees, which can then be scanned by an administrator when they arrive at the event.
The QR code check-in feature is enabled on a per-event basis.
Step 1: Enable QR Code Check-In
- Navigate to Dashboard > Marketing > Events.
- Open your event or create a new one.
- With the event open, click the Edit Event button.
- Tick the Enable Check-In via QR Code option.
- Click Save Event.
Step 2: Enable Event Reminders
A unique QR code is included in the event reminder sent to attendees when they RSVP for your event.
- Navigate to Dashboard > Marketing > Events, and open your event.
- Click the Configure Reminders button.
- Select RSVP Confirmation to add or edit the reminder.
- The Include QR Code option will be enabled by default.
- Tick Enabled, then click Save Reminder.
- Attendees will now receive their unique QR code via email when they RSVP.
Step3: How to Check in Attendees via Front Desk
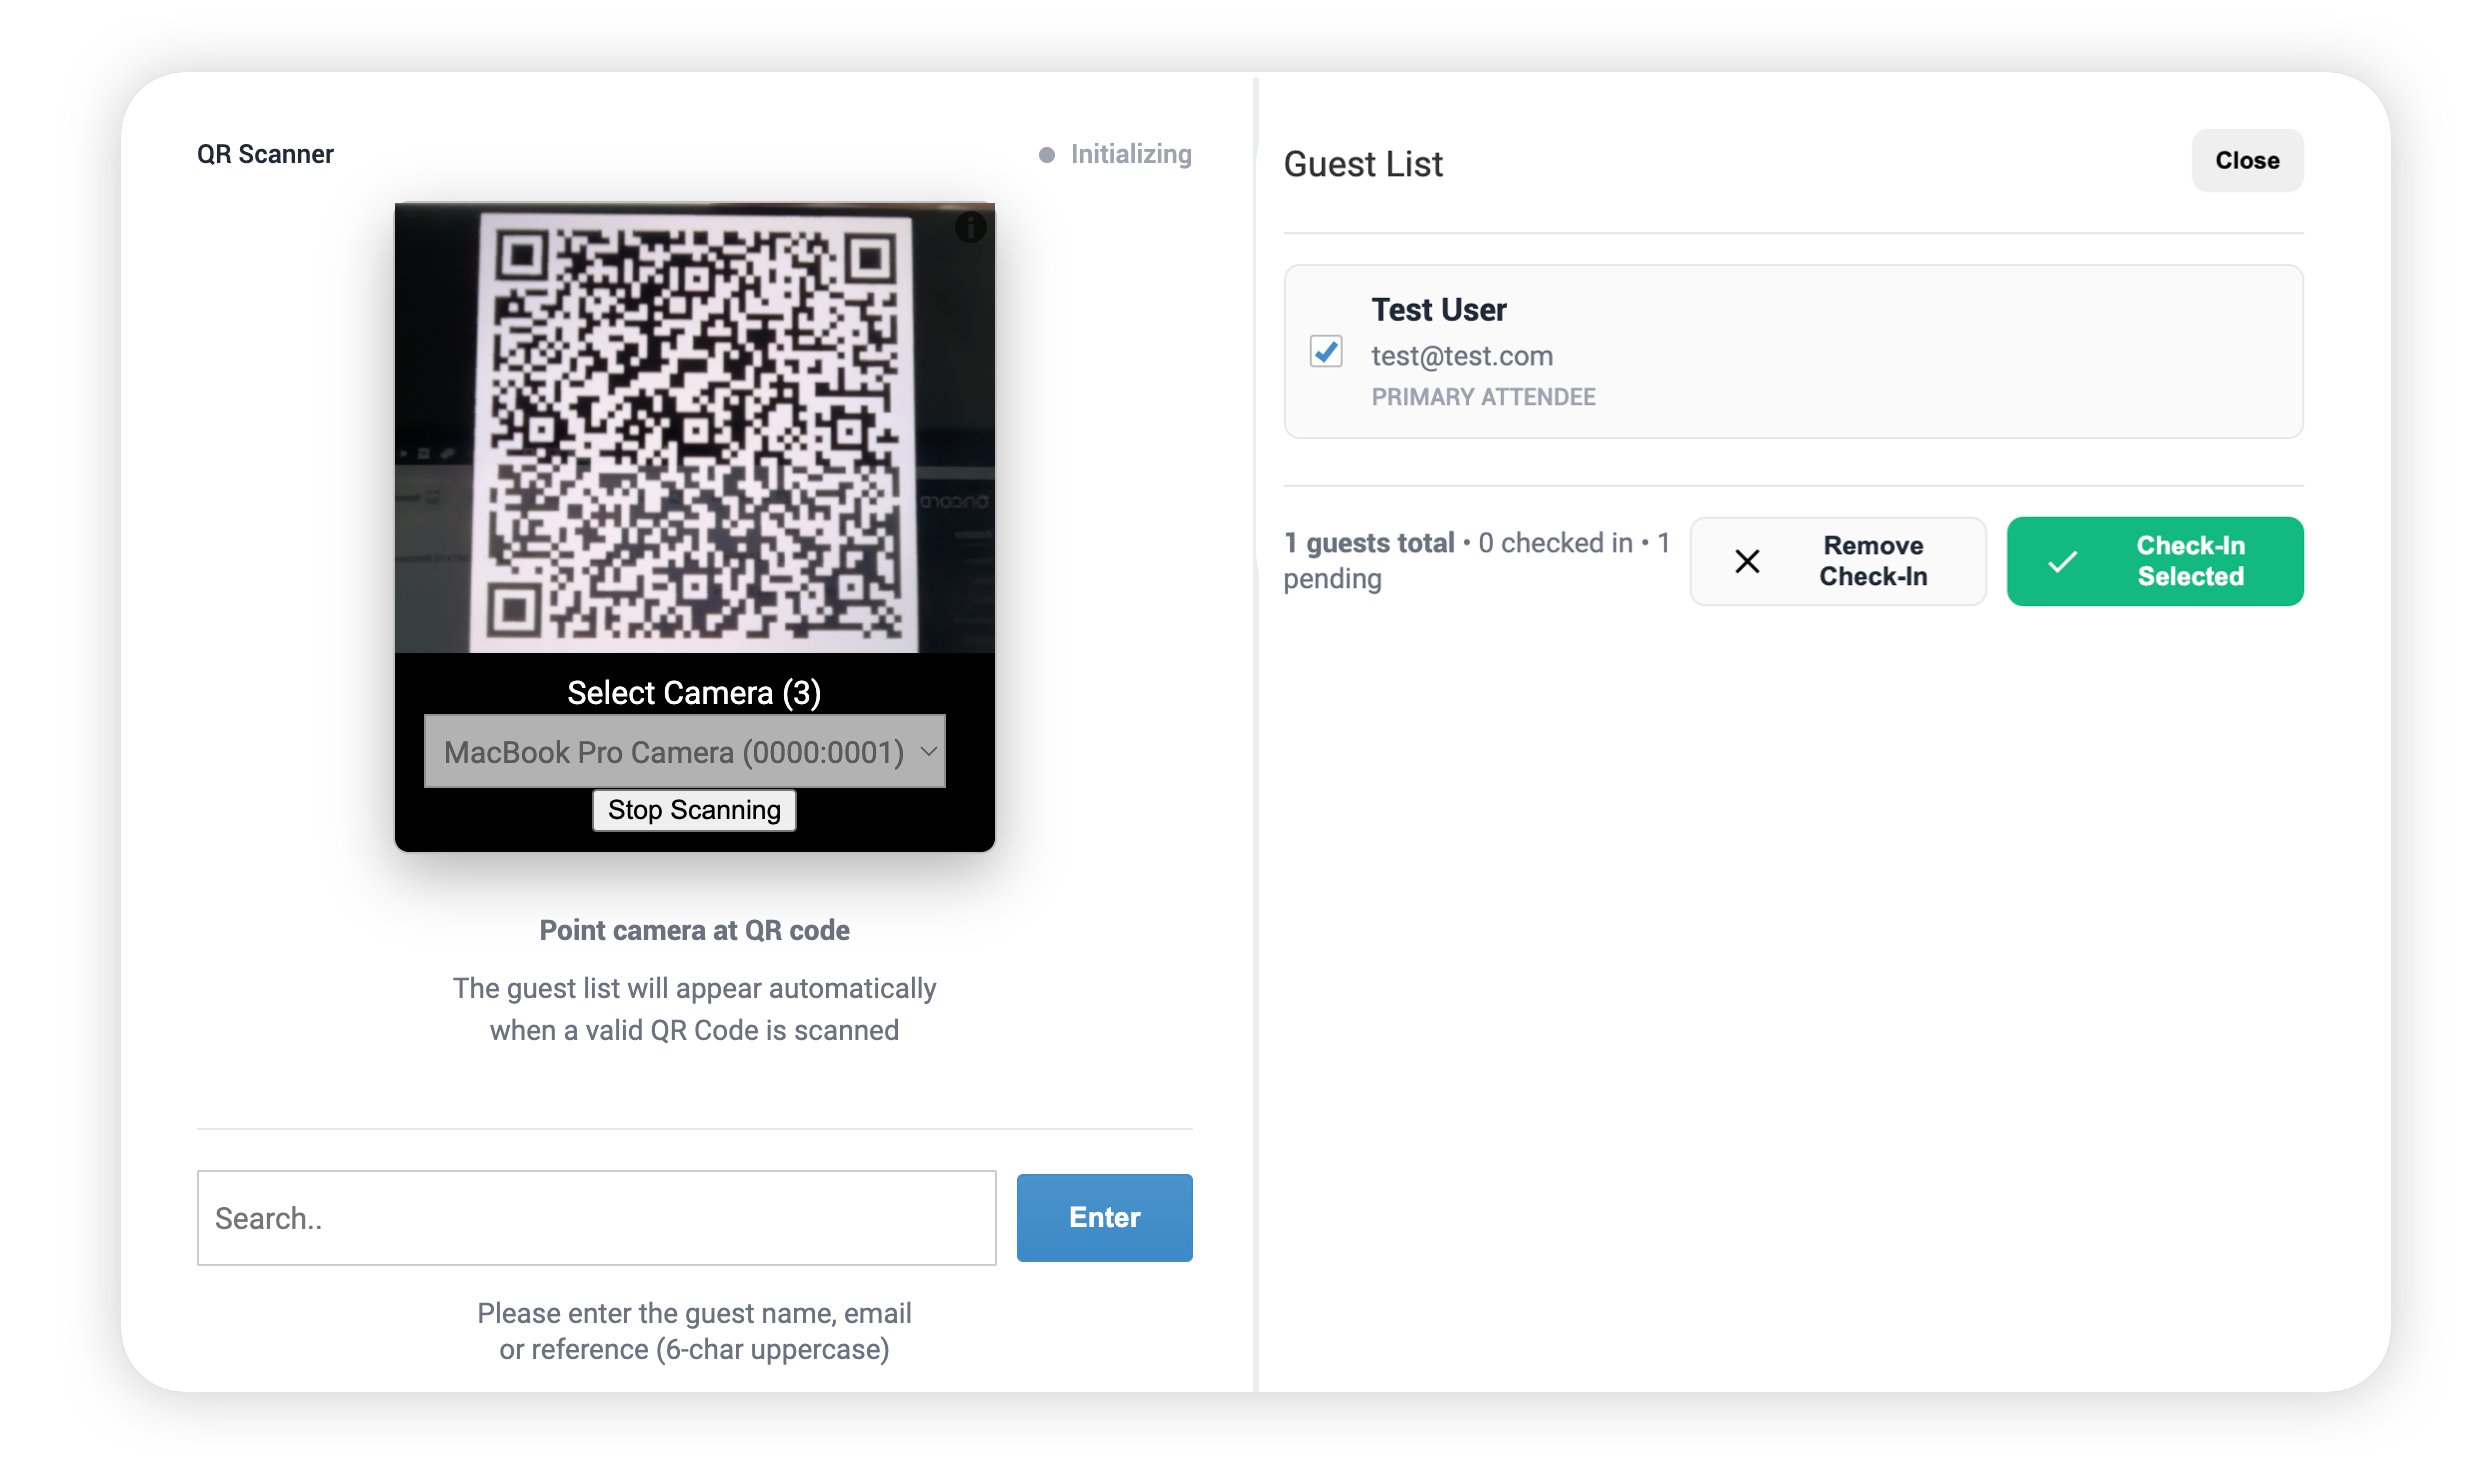
You can use the Front Desk on a mobile device or laptop to scan attendee QR codes and mark them as checked in.Check in using QR code scanning
- On a mobile device or laptop at the event, log in to your Oncord Dashboard as an administrator.
- Go to Dashboard > Marketing > Events.
- Open your event.
- Click Front Desk.
- Allow camera access when prompted.
- Scan the QR code from the attendee’s RSVP email.
Once scanned, a confirmation appears and a green icon displays next to the attendee’s name in the list.
Attendee can't find their RSVP e-mail?
Follow
the instructions above
to check in the attendee manually.