
-
Website
-
3min Explainer Walkthrough

- Generate a Design
-
Page Management

-
Page Editing

-
Form Builder

- Updating Your Navigation Menu
- Creating Page Redirectors
- Posts Management
-
Search Engine Optimization (SEO)

- Setting Up Google Marketing Tools
- Setting Up Meta Pixel & E-commerce Tracking
- Setting Up Microsoft Marketing Tools
- Setting Up Reddit Pixel and E-commerce Tracking
- Setting Up Linkedin Insight Tag
- Optimizing Images For Web
-
Analytics

- Third Party Embed Code
- Special Files
-
3min Explainer Walkthrough
- Contacts
- Marketing
- Commerce
- Apps
-
Settings and Config
- Going Live
- Billing
- Domain Health Checker
- Managing Administrators
- Registering a Domain Name
- Changing Your Domain Name
- The Role of DNS Records Explained
- Backing Up Your Website
- Choosing an E-mail Host
- Hosting Email With Oncord
- Setting Up Gmail Hosting
- Setting Up Microsoft 365 E-mail Hosting
- Setting Up Sub Domains
- Hosting a Sub-Site
- Changes
Creating and Managing Automations
Creating a New Automation
To create a new automation:
- Go to Dashboard > Marketing > Automation.
- Click the "New Automation" button at the top of the page.
This opens the automation editor, where you configure the trigger and define the workflow.
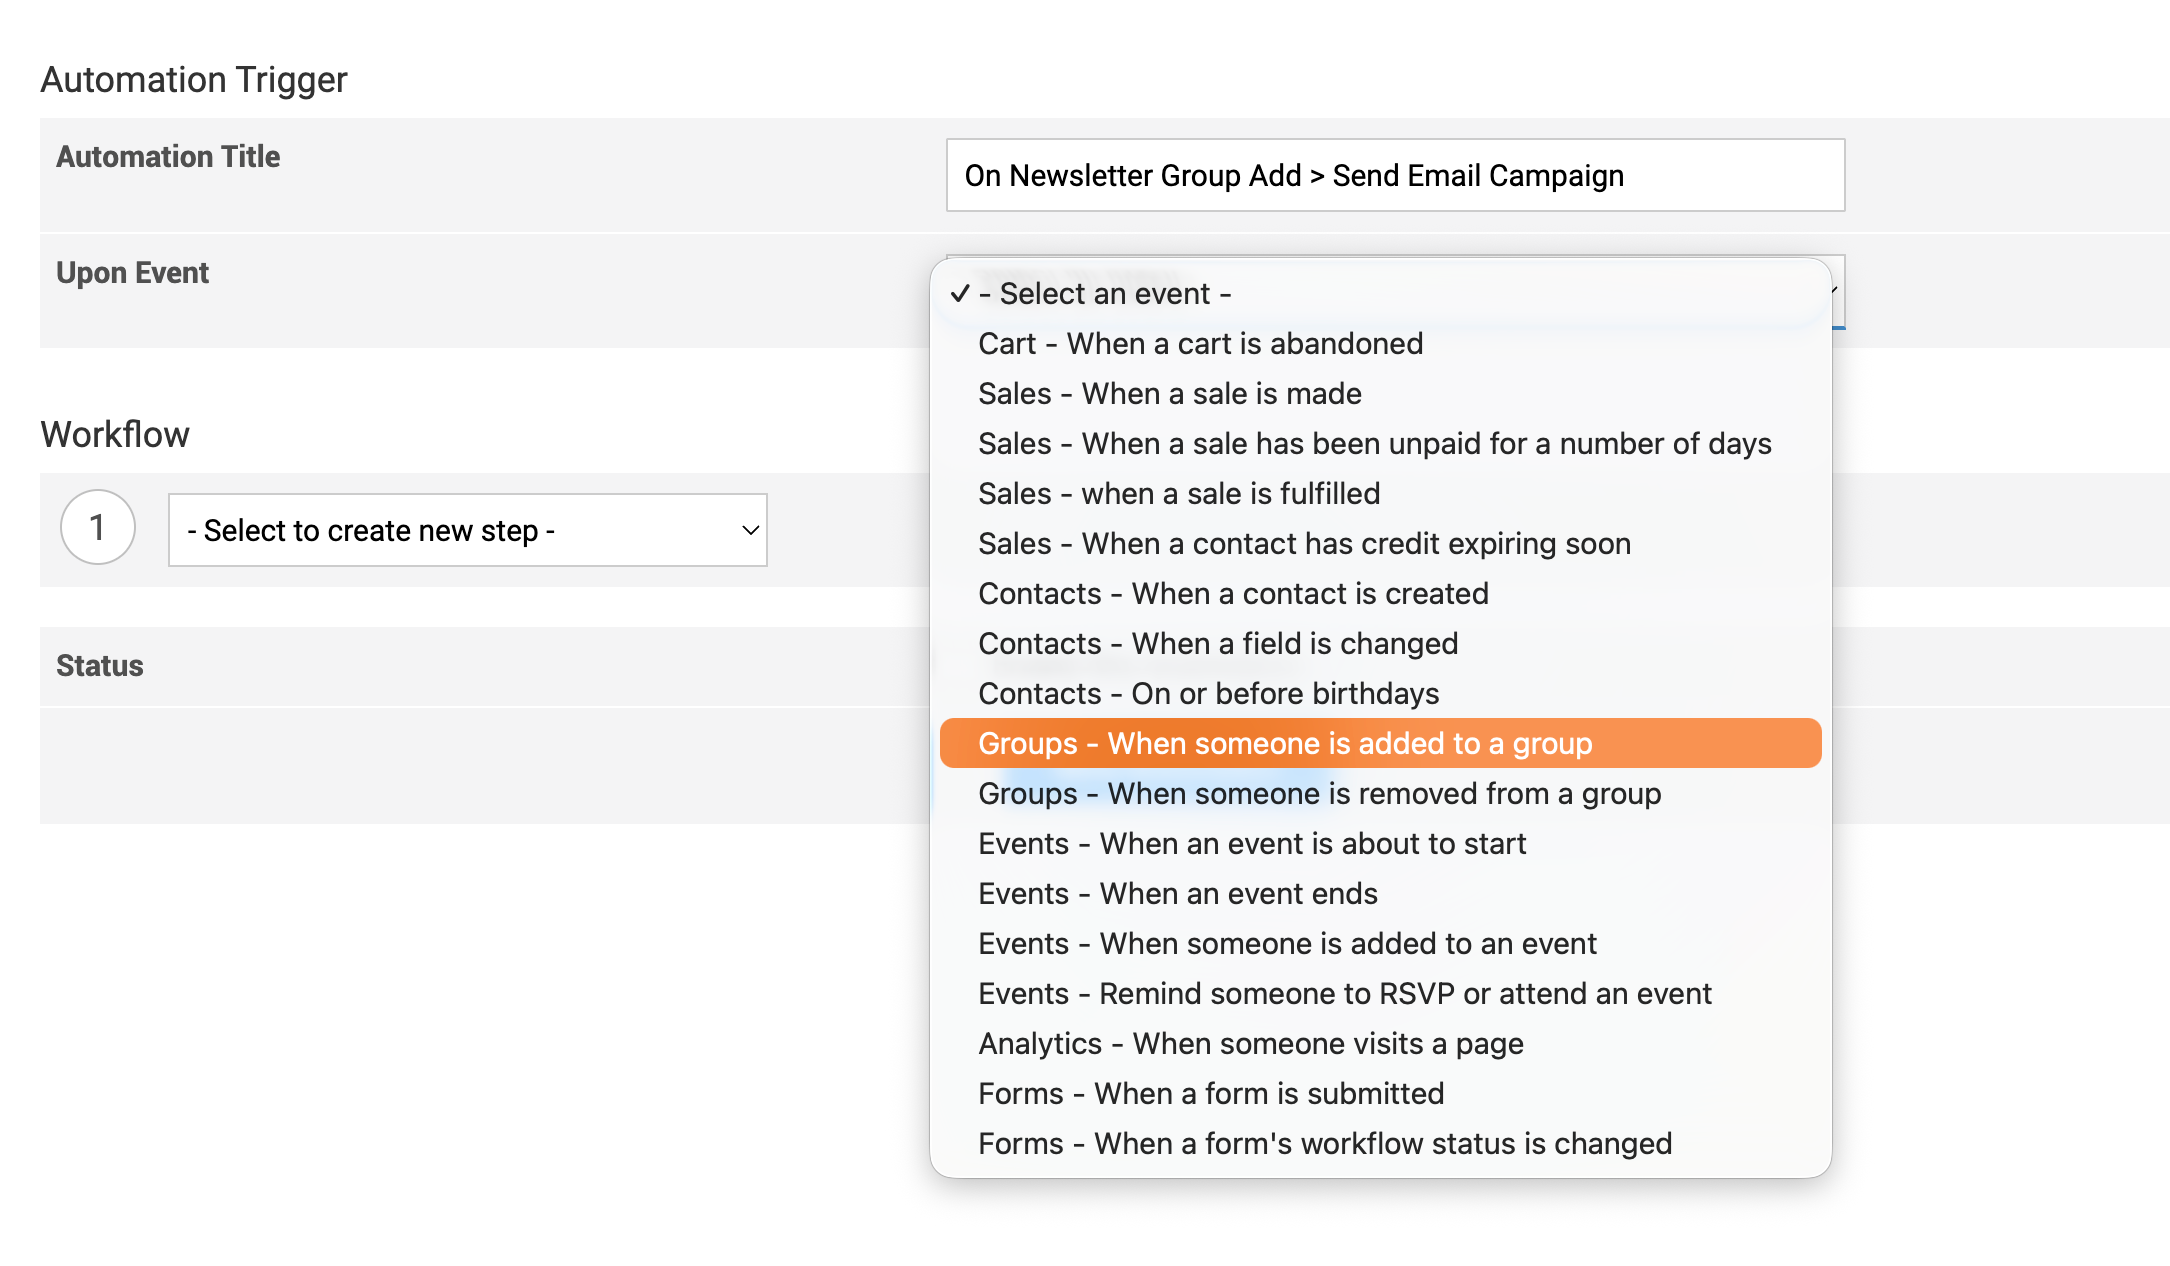
Automation Trigger
The automation trigger defines the event that starts the automation. Every automation must have one trigger.
Automation Title
- Enter a meaningful title in Automation Title.
- The title is for internal reference and is not shown to contacts.
A good practice is to describe both the trigger and the action in the title. This makes automations easier to identify later, especially when you have several configured.
Example:
On Newsletter Group Add > Send Email Campaign
Upon Event
The Upon Event setting defines when the automation should run.
- Select an event from the Upon Event dropdown menu.
- The selected event acts as the trigger for the automation.
- Additional options may appear depending on the event chosen.
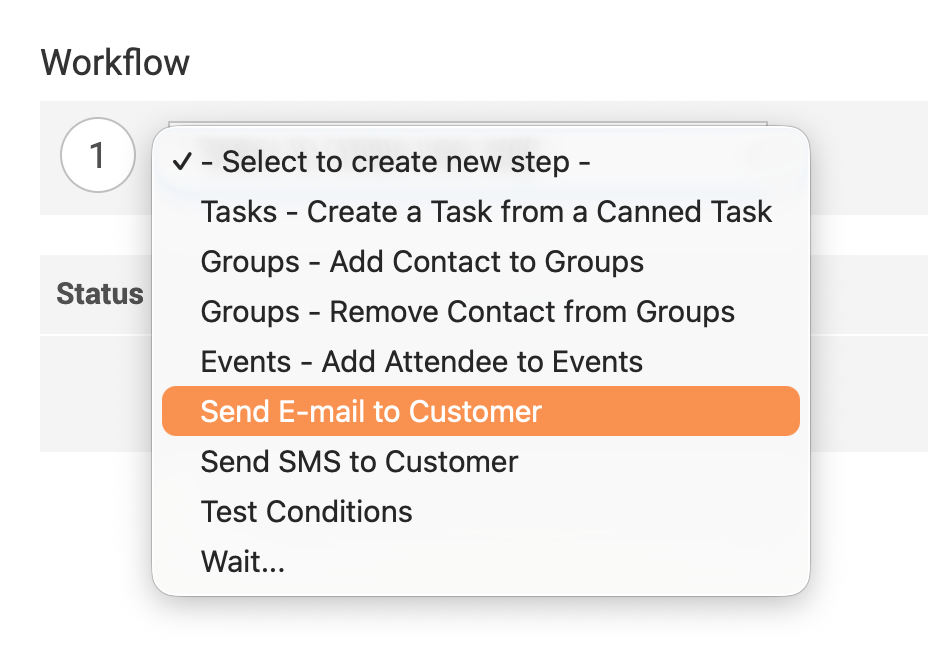
Workflow
The workflow defines the actions Oncord performs after the trigger occurs.
- Under Workflow, select an option from Select to create new step.
- Each step represents a single automated action.
- Steps run in the order they are added.
You can create a workflow with one step or multiple steps, depending on the automation’s purpose.
Note: Automation event triggers and workflow steps are covered in more detail in Automation
Event Triggers and Workflow Steps Explained.
Status
- Tick Enable this Automation to activate it.
- Leave it unticked to save the automation without enabling it.
Click the "Save Automation" button to finish.
Once enabled, the automation will run automatically whenever its trigger conditions are met.

Managing Automations
After creating an automation, you are returned to the automation panel. This is where you can view all existing automations, check their status, review automation progress, and make changes as needed.
To delete an automation:
- Select the checkbox or click the three-dot menu next to the automation.
- Choose Delete.
Testing and Troubleshooting Automations
You can test automations before enabling them in live mode. This helps confirm that messages are being sent correctly and that workflow steps behave as expected.
Using Test Mode
When adding the Send SMS to Customer or Send E-mail to Customer workflow steps, you can enable Test Mode.
In test mode:
- SMS messages are sent to a test mobile number instead of the customer.
- E-mails are sent to a test email address instead of the customer.
- The automation workflow still runs normally, allowing you to confirm timing and workflow behaviour safely.
To use test mode:
- Add a Send SMS to Customer or Send E-mail to Customer step.
- Select Test Mode.
- Enter the test mobile number or test email address.
- Tick Enable this Automation.
Once testing is complete:
- Select Live Mode to begin sending messages to customers.

Viewing Automation Progress
You can review how an automation has run over time.
- Click the number under the Executed column.
- This opens the Automation Progress view for that automation.
The automation progress view shows a history of each time the automation has run.
For each run, you can see:
- When the automation started.
- When it finished.
- Which contact or company was affected.
- The completed workflow steps.
- The final workflow status.
This view is useful for confirming automation behaviour and reviewing completed actions.
Restarting or Pausing Individual Automations
From the automation progress view:
- You can restart an automation if it has finished.
- You can pause an automation if it is scheduled or in progress.
This gives you control over individual automation runs without changing the automation configuration.