
-
Website
-
3min Explainer Walkthrough

- Generate a Design
-
Page Management

-
Page Editing

-
Form Builder

- Updating Your Navigation Menu
- Creating Page Redirectors
- Posts Management
-
Search Engine Optimization

- Setting Up Google Marketing Tools
- Setting Up Meta Pixel & E-commerce Tracking
- Setting Up Microsoft Marketing Tools
- Setting Up Linkedin Insight Tag
- Optimizing Images For Web
-
Analytics

- Third Party Embed Code
- Special Files
-
3min Explainer Walkthrough
- Contacts
- Marketing
- Commerce
- Apps
-
Settings and Config
- Going Live
- Billing
- Domain Health Checker
- Managing Administrators
- Registering a Domain Name
- Changing Your Domain Name
- The Role of DNS Records Explained
- Backing Up Your Website
- Choosing an E-mail Host
- Hosting Email With Oncord
- Setting Up Gmail Hosting
- Setting Up Microsoft 365 E-mail Hosting
- Setting Up Sub Domains
- Hosting a Sub-Site
- Changes
Running Paid Events
Before you begin - Oncord's Commerce features are required to run paid events. Adding features and changing your Oncord plan is easy, click here for instructions.
Configure a Paid Event
To create a paid event in Oncord, you’ll first need to link it to a Product. Here’s how:
-
Access Events
Navigate to Dashboard > Marketing > Events to view existing events or create a new one.
-
Configure Pricing
When editing your event, open the Pricing tab. Tick Admittance requires purchase to unlock payment and pricing options.
-
Link a Product
Every paid event requires a Product. You’ll be prompted to either:
-
Create New Product – The details you enter for Price, Brand, and Category will be used to generate a new Product.
- Find / Edit Existing – Search your Product catalog and link an existing Product.
-
Create New Product – The details you enter for Price, Brand, and Category will be used to generate a new Product.
-
Save the Event
The Product is created (or linked) when you click Save Event. When you return to the Pricing tab, the system will default to Find / Edit Existing.
-
Manage Linked Products
If needed, you can change the linked Product at any time by updating the event. To keep your catalog tidy, consider removing unused Products via Dashboard > Commerce > Products.
Guest Pricing
You may opt to charge guests a different price.
If guests are allowed (allow guests through the "RSVP Options" tab), an additional field will display at the bottom of the pricing section to enable guest pricing.
If the "Different" option for guest pricing is selected, an Additional Attribute will be added to the product specifying the guest price as an ordering option.

Order Options
Within the pricing details of an Event, Product Order Options can be used to allow attendees to choose between event options. Order options can be used to modify the price to attend the event.
As an example - you may setup a "Ticket Type" option, with the values Standard, VIP, and Sponsor, where each option is priced differently:
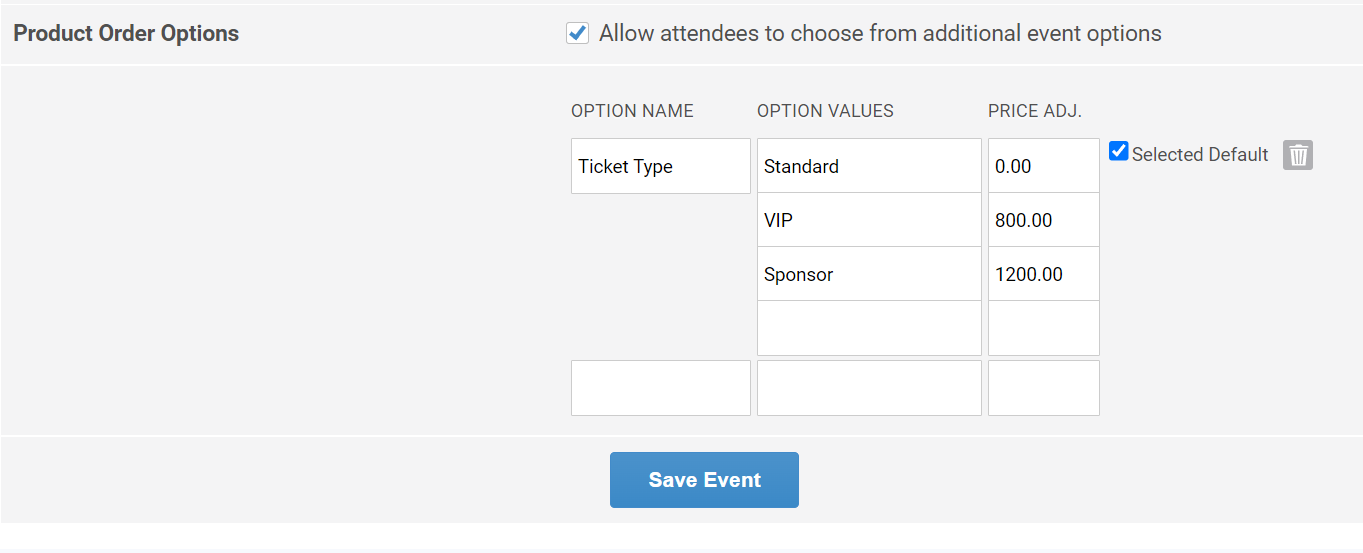
The above order options would then show to users when they RSVP for an event:
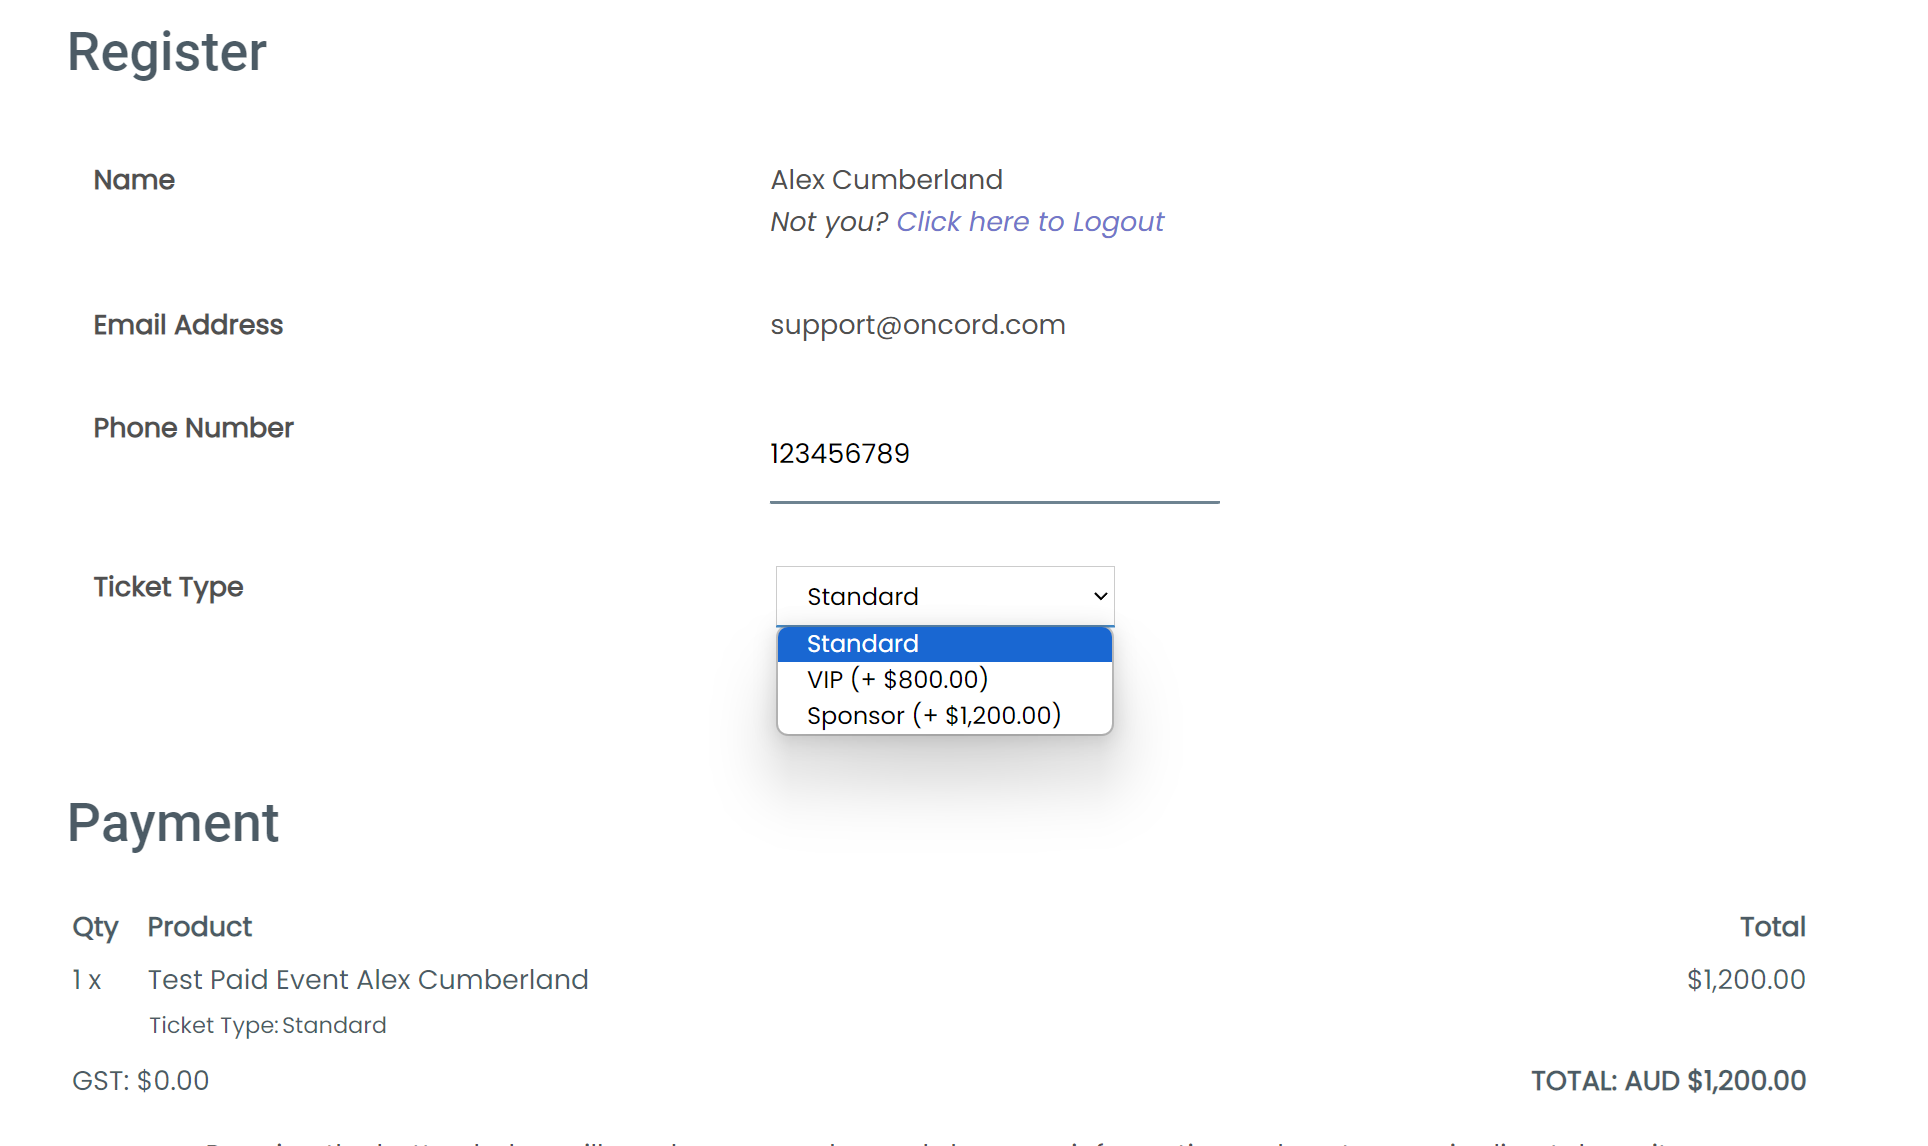
Taking Payment & RSVP for Paid Events
If your event has been configured to require purchase, your configured payment methods will appear below the RSVP form.
To configure payment methods, go to Dashboard > Settings > Commerce > Payment Methods. Click here to learn more about payment methods.
When a user completes payment for the event, an invoice will be raised and sent automatically.